|
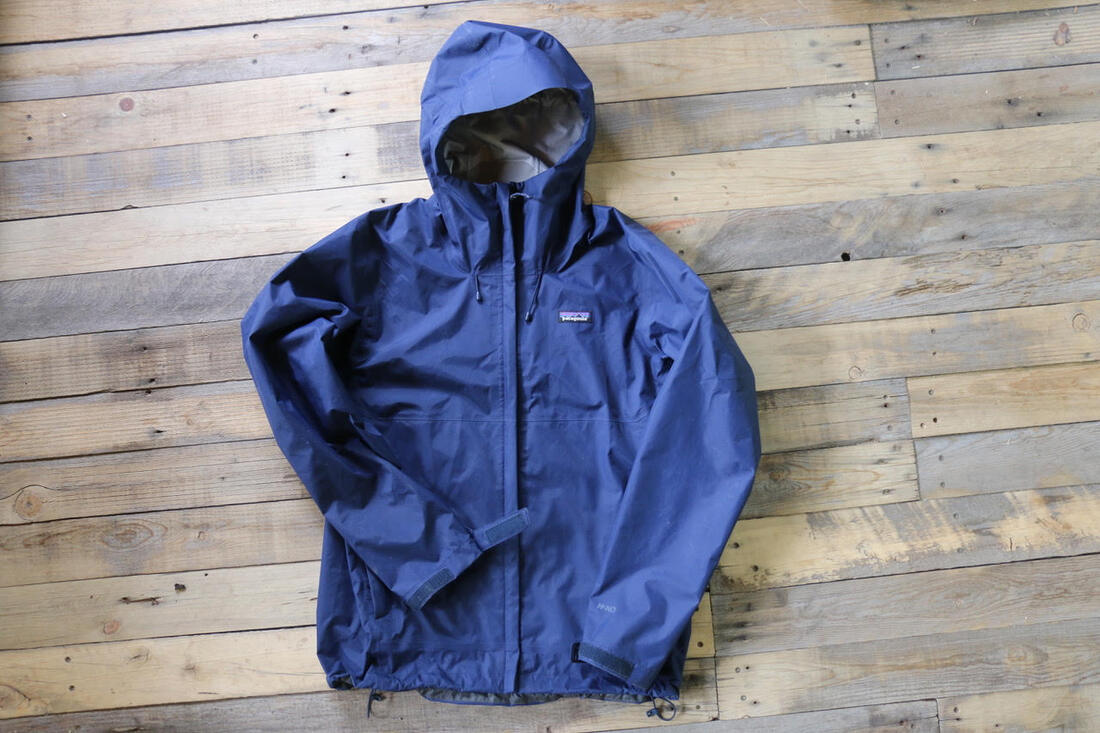
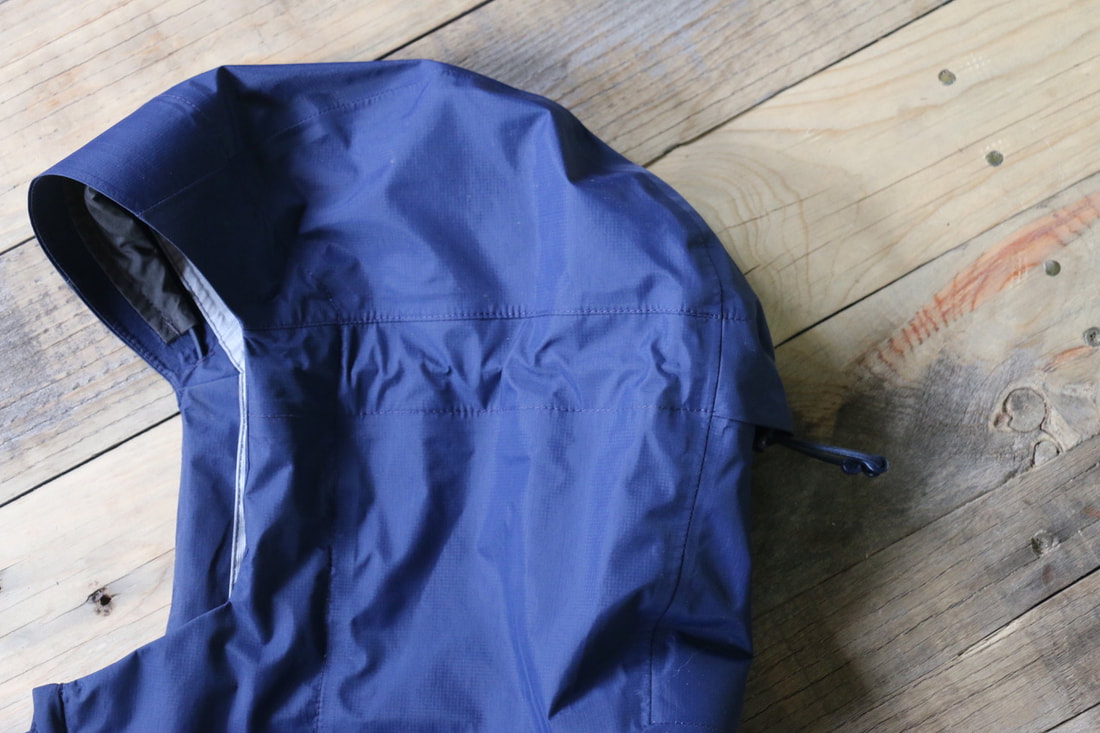
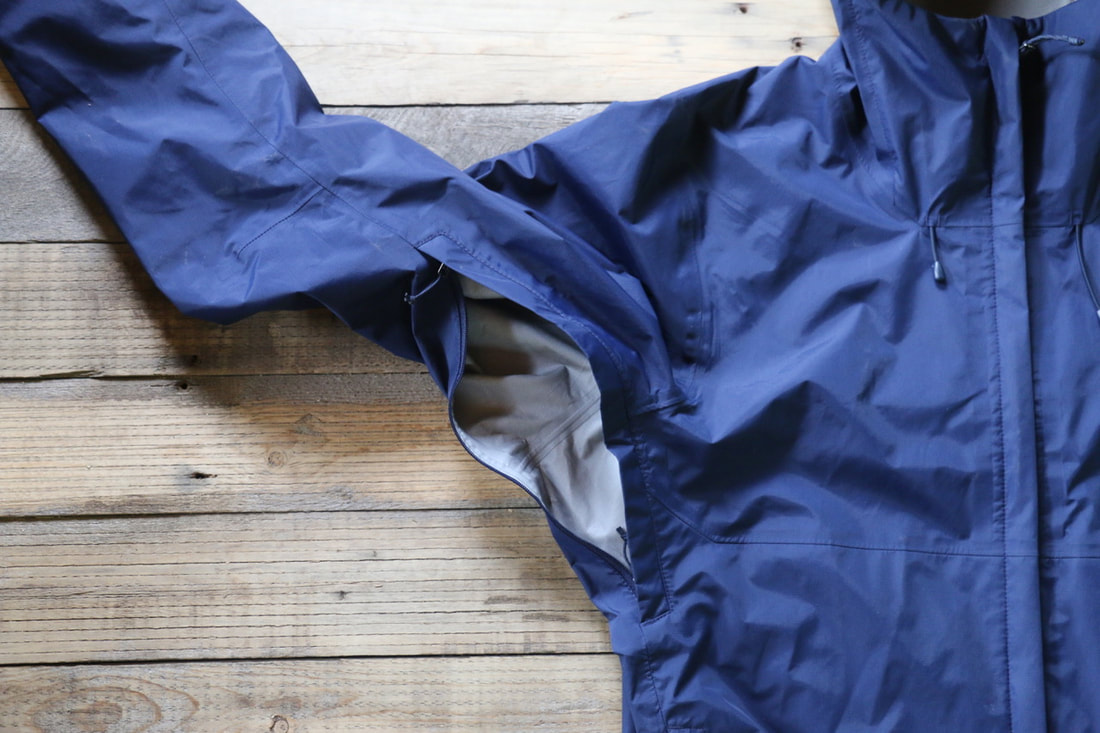
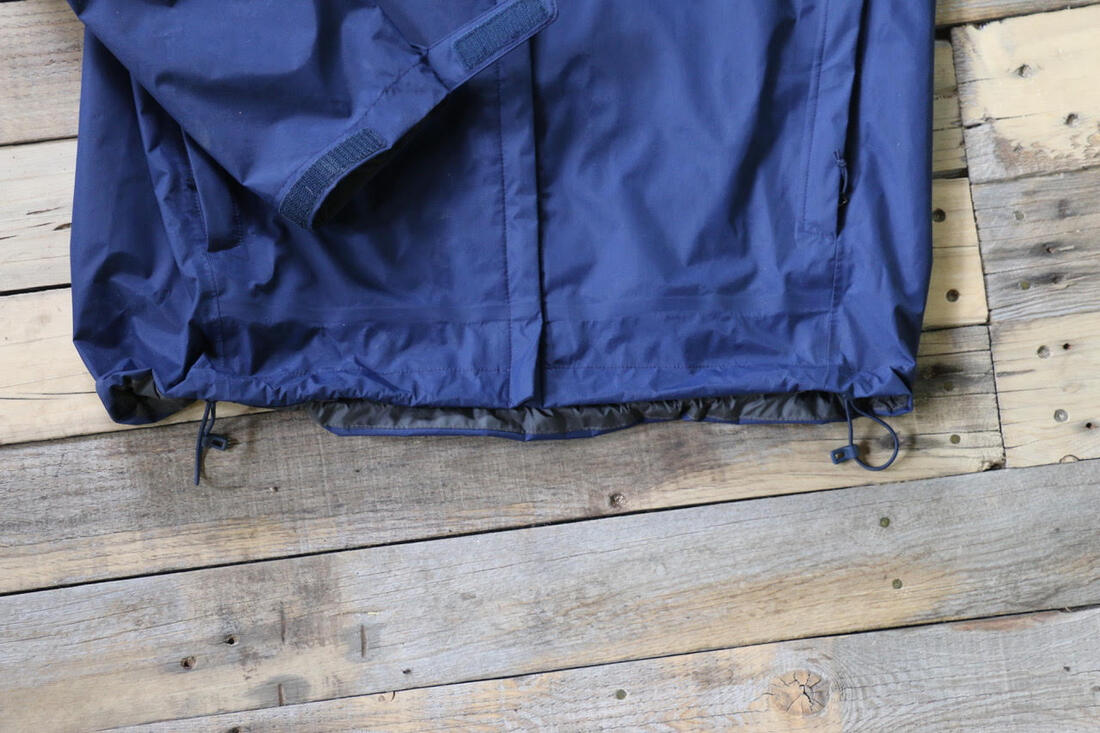
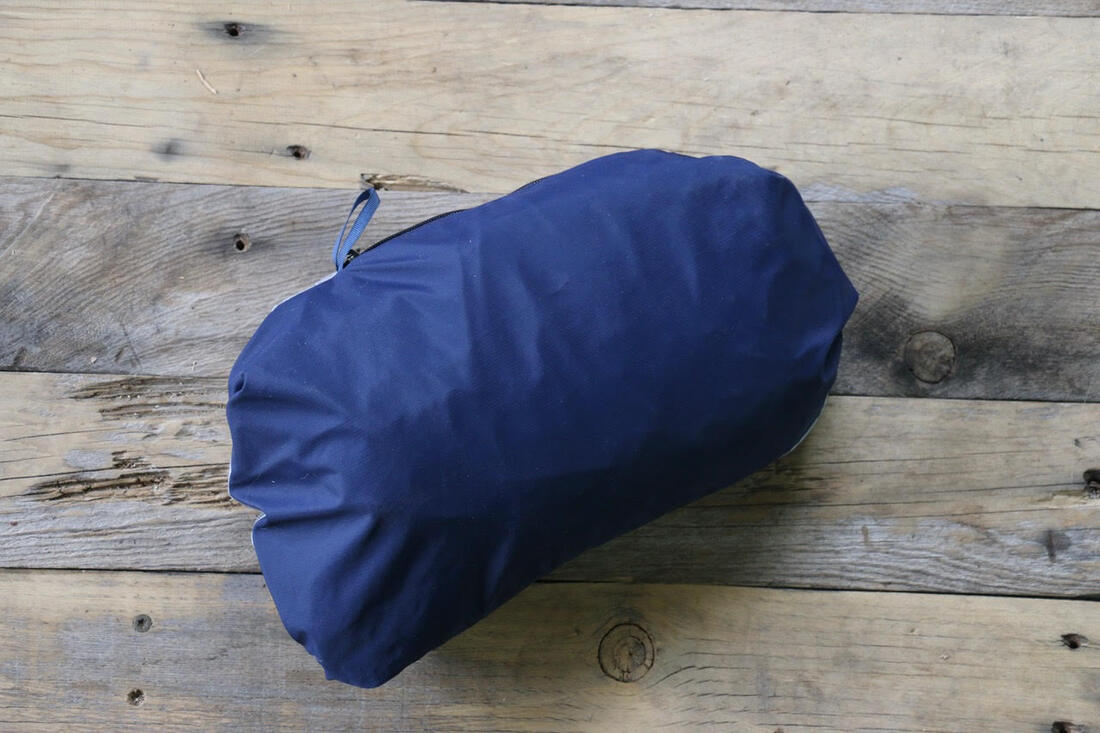
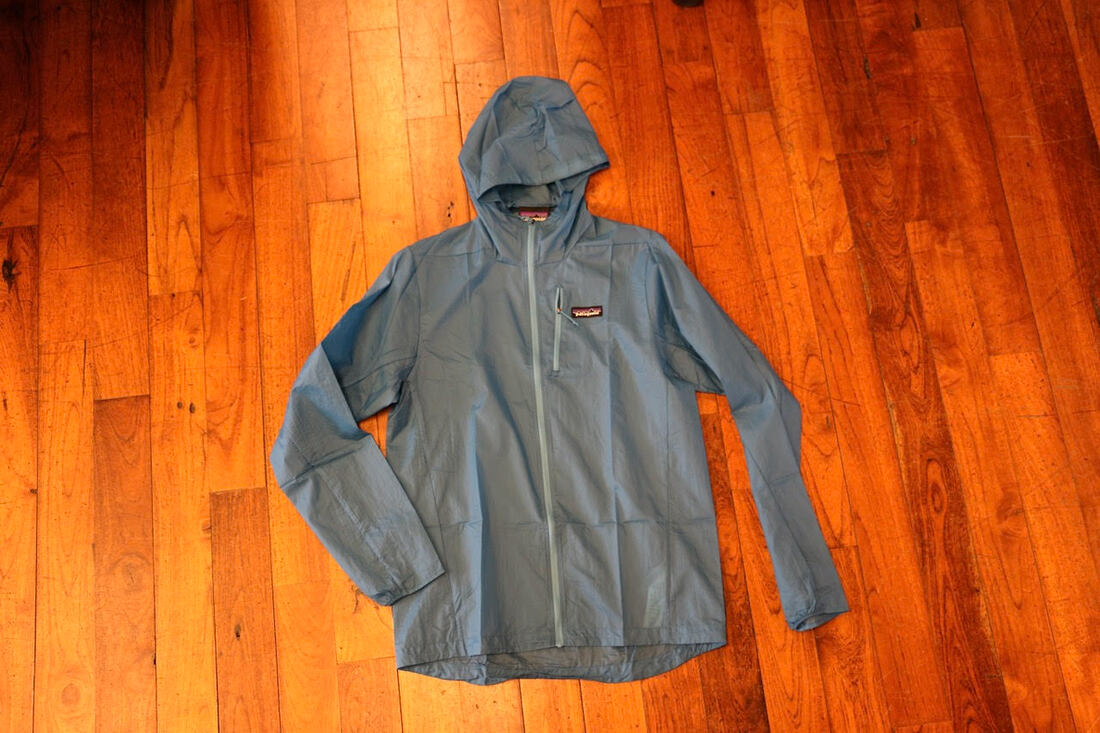
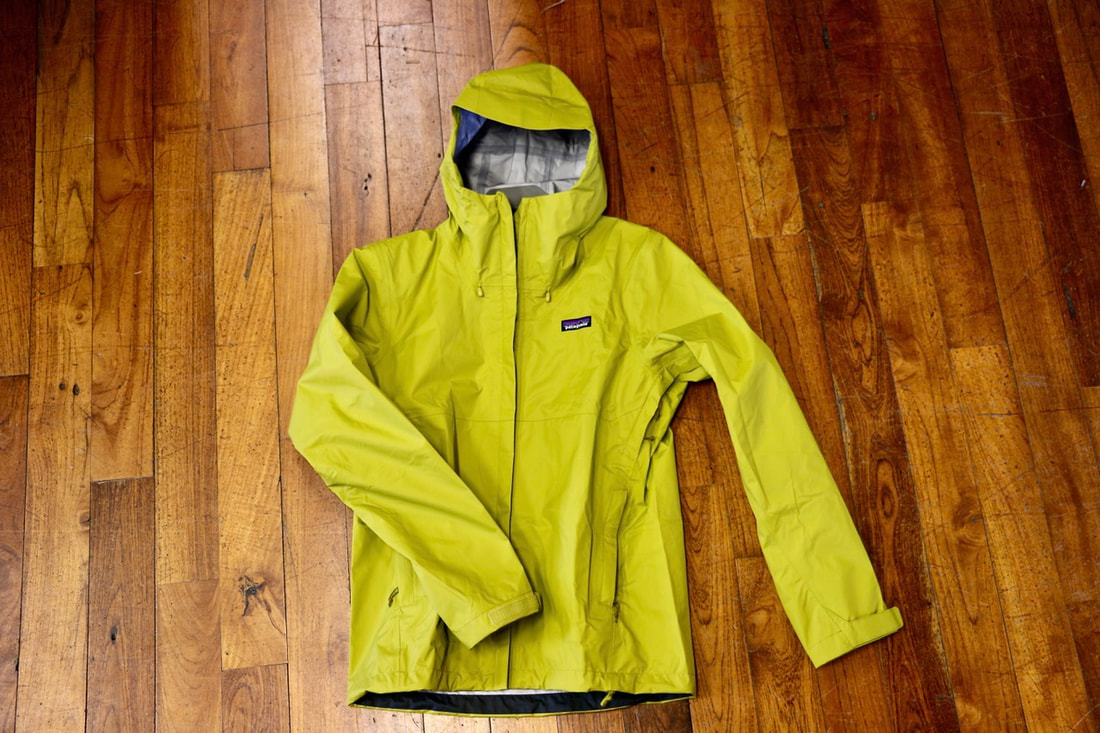
story, photos and video by Murray Selleck, HIKE ROCKY magazine's gear reviewer Editor’s note: HIKE ROCKY magazine receives no compensation for brands reviewed by Murray Hiking while it’s raining is wonderful. The sound of raindrops hitting the forest floor with soft “tap tap taps” is delightful. The intimacy of nearby birds chirping and singing will have you walking slower while you endeavor to make no sound yourself. Thunder rolls down from the clouds, fills the valleys and echos off the steep rock faces. Aspen leaves quake in the wet breeze letting loose their own shower of raindrops. New spring green becomes even more vibrant, washed clean with the rain. Those who are out hiking in the rain count themselves lucky to experience it. Quiet footsteps on rain-softened trails is such an incredible contrast compared to what most of us have been used to: dusty trails packed hard as stone, every step joint-jarring. Low, heavy clouds flatten ridge tops and drape the forest in a gossamer web of drifting humidity. The terrain appears practically unrecognizable to hikers hungover from decades of drought. Despite some trails becoming slick, despite grand vistas lost in the low hanging vapor, despite the goose-bump-generating temperatures and despite ourselves – a hike in the rain should not be passed up. It should only be seen as an opportunity! This spring my go-to piece of rain gear to get me out no matter what the day brings is the Patagonia Torrentshell 3L Rain Jacket. When you are dry and comfortable any wet weather you encounter is manageable. The alternative to dry and comfortable is wet and miserable and getting caught out unprepared in a rain storm leaves little doubt as to why hiking in the rain gets such a bad rap. Gear up with the Patagonia Torrentshell and embrace a rainy day! Patagonia Torrentshell Features: The Hood Starting at the top, there are two ways to adjust this hood to suit your face and preferences. The very top cord on the back of the hood will pull the sides of the hood back to increase your peripheral vision. There are worse things, but it is aggravating to turn your head to the side only to see the inside of your hood! With this side adjustment you eliminate this possibility and replace it with being able to see everything you’re looking for. The second hood adjustment are two pull cords at the top of either side of the front zipper. These cords will pull the hood down and snug it around your head, ball cap, helmet, or knit hat. These pull cords help you batten down the hatches if your hike turns into a torrent! The visor of the hood is laminated so it won’t flop down over your eyes. And the last feature is that the hood can roll up securely out of the way if no hood is needed at all. The top adjustment cord on the hood has a tiny hook that after you roll the hood up will attach to the loop just inside at the top of the jacket. This keeps the hood rolled up and out of the way. If you have read any of my previous articles or watched some of my video contributions to HIKE ROCKY magazine, you know that I am not a huge fan of hoods. With Patagonia’s Torrentshell, I make an exception! However, hoods do reduce hearing. That fact remains my biggest complaint with hoods. I need to hear all there is to hear – especially when I’m out hiking. I do concede that when Mother Nature has opened up every faucet in the heavens, a hood is a good thing. If a hood keeps one single raindrop from sneaking all the way down my spine, then in this case, I thank Patagonia for the Torrentshell hood! 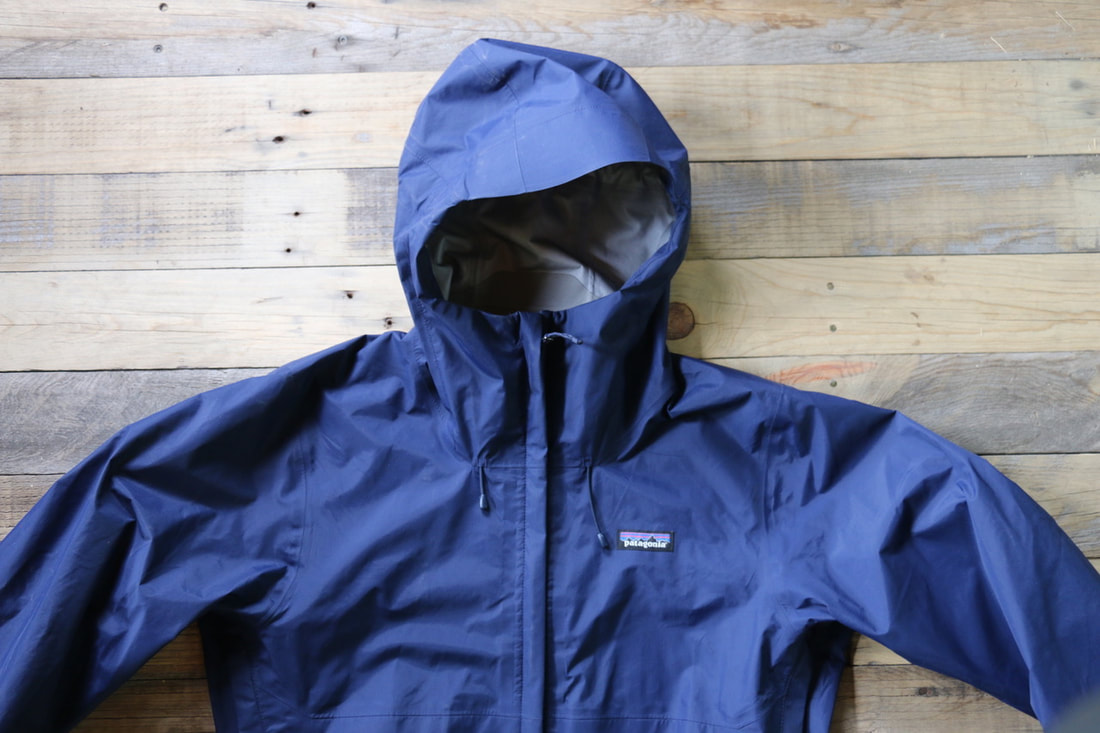 Waterproof/Breathable The Torrentshell is designed and manufactured with 100% recycled waterproof/breathable face fabric. It achieves Patagonia’s H2No® Performance Standard for a three-layer shell with a PFC-free DWR finish (durable water repellent coating that does not contain perfluorinated chemicals). The three layers are the recycled nylon ripstop face, a polycarbonate PU membrane with 13% biobased content, and a tricot backer and a PFC-free DWR finish. All this tech is to say the Torrentshell will keep you dry with best environmental manufacturing practices in mind. One of the main things I like about the Torrentshell and the reason I purchased one is how light and packable it is. With many more expensive laminated waterproof jackets you get a stiff crunchy feel which can be fine for a winter jacket but if you are looking for a lightweight, easy-to-pack rain jacket, then consider the Torrentshell. Two Pit Zips Pit zips are a mechanical way of opening up the jacket to allow more body generated heat to escape from underneath the jacket. The Torrentshell is waterproof and breathable. There are tons of waterproof/breathable jackets on the market and with no exception you must consider “breathable” with realistic expectations. The Torrentshell is no exception and that is why most manufacturers, including Patagonia, offer pit zips on their rain jackets. Hiking up a steep trail, hiking fast, or even trail running in the rain will generate more body heat than what the jacket can breathe or expel on its own to keep you from over heating. So how do you cope? You open up the pit zips and even zip down the front zipper to release more heat to regulate the microclimate you create under the jacket. The cautionary note with pit zips or unzipping the front collar to vent is the risk of allowing rain, grapple, hail, sleet, or even snow an easy way in. Just be weather and vent savvy. Main Zipper Line I love the fact that Patagonia does not use any velcro to protect the front zipper. Velcro on a zipper line just inhibits the zipper slider from working. Patagonia’s front zipper is touted as snag free and that is pretty much true. The slider may encounter a hiccup or two as you’re using it but that is nothing compared to trying to un-velcro velcro and work the slider up or down as the velcro reattaches itself. A no-velcro, no-snag zipper is a wonderful thing. This front zipper is rain protected by essentially three storm flaps. The main storm flap is on the outside and covers the zipper nicely. The two remaining flaps cover the other side of the zipper line and seal out any wind- driven rain. Nice. Two Pockets The Torrentshell has two very good sized hand pockets with zipper closures. Pockets are not only good for keeping items handy, they can also offer some warmth if you’re not wearing gloves. (I do own a wind shell that has no pockets and there are times I sorely wish it did). You can stuff the entire rain jacket into the left pocket for a handy way to store the jacket when you’re not wearing it. The pocket itself acts as the stuff sack. This pocket has a small loop inside it so you can carabiner the stuffed jacket to your pant loop or daisy chain on your pack. Tip: When you stuff the jacket into the pocket turn the pocket inside out as you stuff the jacket. Cuff and Waist Adjustments Both sleeves have the common velcro closures to help you adjust the length of the sleeve and loosen or tighten the cuff around your wrist. I do have long arms and I like being able to snug the velcro around my wrist to create the correct length of sleeve. I also like the fact that Patagonia has not cut the sleeves too short which is a typical problem for tall and lean hikers. Sleeves that actually run the full length of my arms practically make me giddy! Another common feature is a cord to snug the hem of the jacket around your waist. When the rain and temperatures drop at the same time it is nice to be able to snug the jacket around your waist to keep the body generated heat in the jacket to maintain warmth. The Fit and Year-Round Versatility I am about six feet tall with long legs and arms. Lean and 160 pounds. I wear a size medium in the Torrentshell and it fits perfect. Sleeves that reach a touch beyond my wrists are wonderful. The length of the jacket is not too long which I also like. There is room for additional layers underneath the jacket if I need them. There is no reason why I can’t wear this as a winter shell when the conditions warrant adding even more year-round value to this jacket. Recycled Fabric The Torrentshell is made with recycled nylon. Creating fabric from recycled material may not be newsworthy but in this case it is. Patagonia produced its spring 2023 product line with 89% recycled nylon. Part of their recycled nylon comes from old carpet and old fishing nets. We all need to think more carefully not only about what we buy, but from whom we buy it. Too many “me too” companies out there only pay lip service to our climate crisis and often exaggerate their environmental record. I believe my dollars are well spent when I support Patagonia. Their products are sound and so is their business ethic. Conclusion I like it and recommend it. Now let’s get out and hike… no matter what the day’s weather may bring! 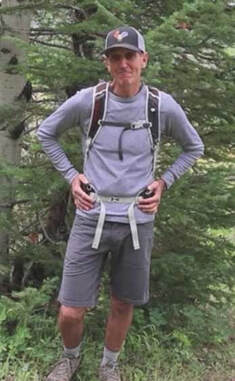 Murray Selleck moved to Colorado in 1978. In the early 80s he split his time working winters in a ski shop in Steamboat Springs and his summers guiding on the Arkansas River. His career in the specialty outdoor industry has continued for over 30 years. Needless to say, he has witnessed decades of change in outdoor equipment and clothing. Steamboat Springs continues to be his home. This piece of original content was made possible by Heidi RIedesel, Realtor; Estes Park Health; and, Snowy Peaks Winery.
0 Comments
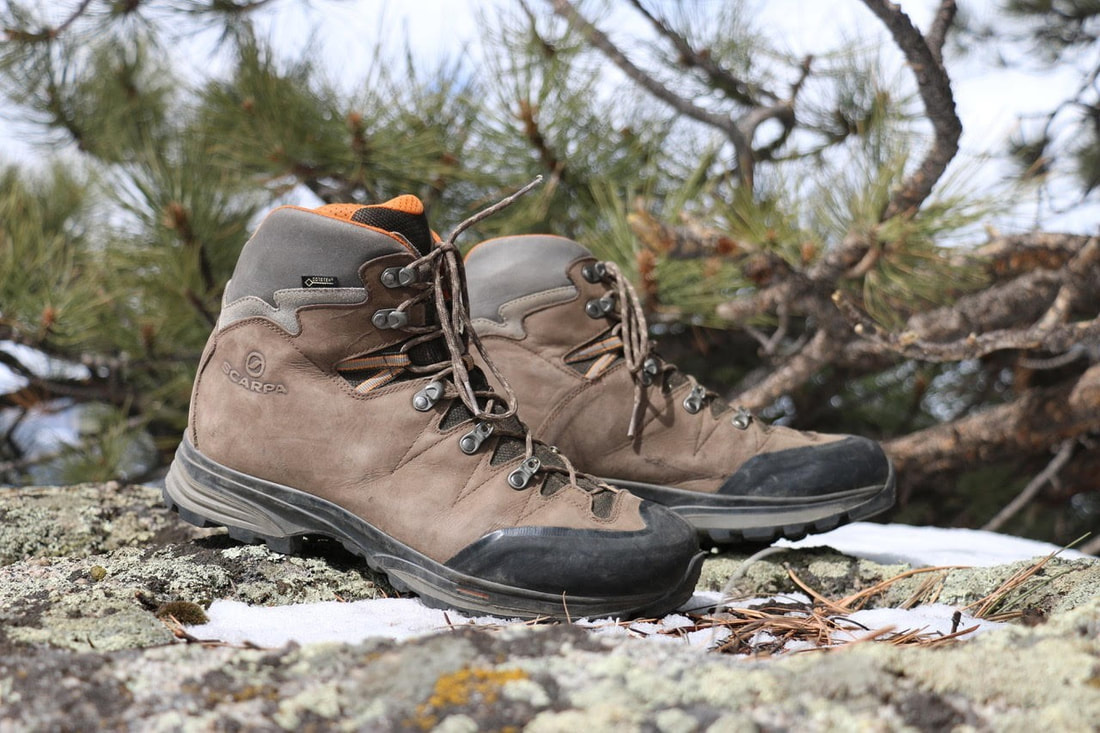
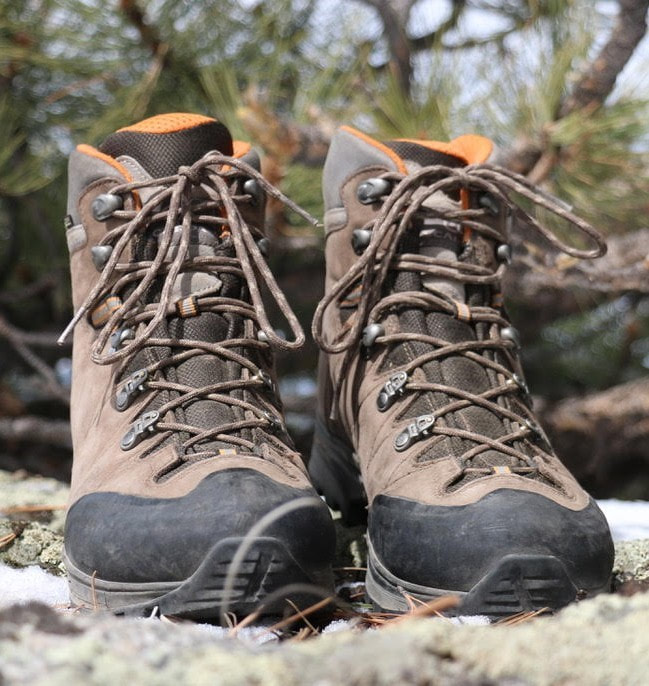
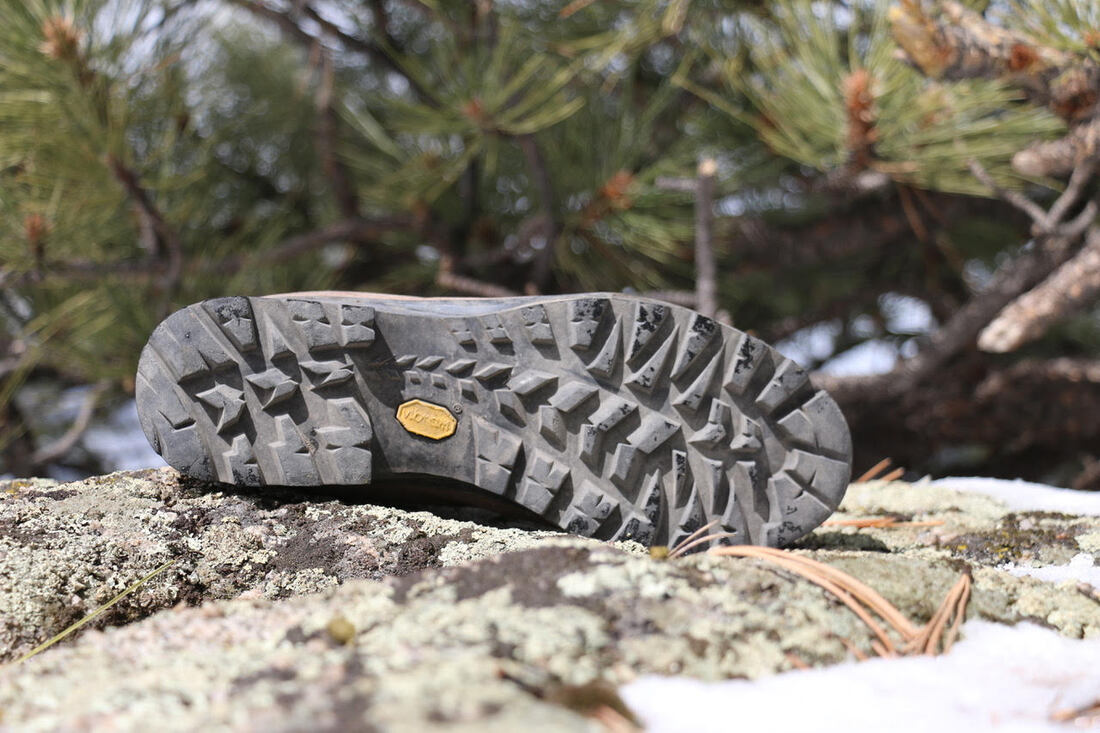
story and photos by Murray Selleck They're a touch heavy. They're stout and strong and beefy. They have covered some tough terrain over more miles than I can count. They are my full-grain leather, Goretex, durable, rockered, ankle protecting, Vibram soled Scarpa Zanskar* hiking boots. When I hike I don't leave home without them! I've had these boots for years and they show little wear and tear despite the heavy use. Full-grain leather offers a very durable boot construction. Cuts and scrapes into the leather do little to affect the life of the boot. If I relied on lightweight trail shoes these past years, I probably would have bought and replaced at least five or six pairs instead of relying on my single pair of leather boots. The math and money quickly reveal you get what you pay for. The weight of a full-grain leather boot, of course, will be more than a trail running shoe or lightweight hiker. Perhaps it is my mindset or that the benefits of this kind of boot are so ingrained into my thinking I don't notice the weight. I haven't felt any more tired at the end of the day than any of my hiking partners due to the weight of my footwear. I do know that often some of my hiking buddies wearing softer footwear are bit slower when the pace when we're navigating a steep boulder field or traversing a slippery angled slope of scree. “Fast and Light” is the mantra of many a hiker, however, the rest of that story might include “fast to wear out and fast to replace.” I believe there is much to say about sustainability and durability and that includes my choice in footwear. My leather boots are strong torsionally and the sole protects my feet from sharp stones and sharp edged boulders. I can pretty much step anywhere with confidence. I don't feel the boot sole folding over rocks and I can edge into a loose traverse keeping my footing. The boot sole creates a strong platform that supports my foot. The benefit is my feet don't get beat up during big mileage days. An additional benefit to footwear with good torsional sole strength is protecting your ankles from a nasty twist or sprain. Soft trail running shoes or lightweight hikers that can be twisted like a wet sponge offer little in protecting you from a sprained ankle. I like a long, injury-free hiking season! The fact that my boots are waterproof speaks to their multi-seasonal functionality. Early spring hikes when snowdrifts as big as whales attempt to block the trail, I find it easy to stay on route. I can easily kick into drifts and snowfields creating a secure staircase of steps. When summer monsoons dump not only rain, but also hail and grapple turning dusty trails into liquid channels of water and mush, my feet stay dry. And in the fall, when an early snow tries to cut the hiking season short, a Goretex waterproof boot (or equivalent) extends the hiking season until we happily replace our hiking boots with skis and snowshoes! Lightweight, breathable, non-waterproof shoes in any of these situations will have your socks soaked and feet cold and miserable. Long ago I learned hiking when your feet feel like cold stumps and you can no longer feel the trail beneath frozen feet is no way to happily cover distance. In fact, you just can't get home quick enough. The Vibram soles on my boots have plenty of tread life left and the secure traction the boot sole provides is a wonderful thing. As mentioned above, when your boots have a nice lugged sole with bombproof traction stepping up and on to teeter-tottering boulders is easy. Keeping your footing while on snowfields or tromping along slushy trails is just what you do. No hesitation, no route finding dilemma, just do it! Most leather boots have a rockered sole. That is the sole is pretty flat along the length of your boot but up toward the toes the sole bends upward. This is called rocker. Rocker helps propel you forward. There is a designed mechanical benefit built into the boot sole to roll your stride forward comfortably even in a beefy leather boot. Rocker offers a very natural walking feel to the boots. My Scarpa boots are cut above my ankle bones. Those of you who like to hike in trail running shoes are cringing. However, it has been a very long time since the outside of my ankles have clipped a trailside rock sending me cringing, cursing and hopping up and down the trail with tears in my eyes. Above-the-ankle cut boots offer more ankle bone protection. And when the time comes, my boots will be able to be resoled. New rubber. New tread. New life! Rocky Mountain Resole in Salida, Colorado does a terrific job at extending the life of many kinds of boots. As long as I keep the uppers in reasonable shape, a new Vibram sole can be applied. One small step for man, one giant leap for keeping your favorite boots! I believe most hikers have forgotten how versatile a leather boot can be. The trend in footwear for hiking over the past decade has been to use trail running shoes. I won't argue that point. What I will argue for is that if you are not convinced a leather hiking boot is in your future at the very least make sure your trail running shoes or light hikers are waterproof. Leave No Trace Ethics teach us to stay on the trail. If there is a muddy bog or puddle we should walk right through it splishing and splashing. Leave No trace teaches you to prepare for your hike or backpack trip before you leave. A big part of preparation is proper footwear. Walking around mud puddles only widens the trail. Or worse yet, multiple parallel trails are created as hikers detour farther afield just to keep their shoes from getting wet. Trampling fragile vegetation and creating unintended trails is not good. Think. Plan. Prepare. And hike as if you are the first but not the last! *The Scarpa Zanskar is no longer in production. However, the Scarpa Kinesis Pro GTX, Kailash Plus GTX, and Terra GTX are all great leather boot choices. 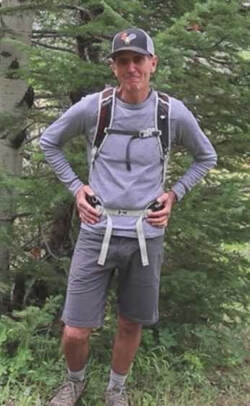 Murray Selleck moved to Colorado in 1978. In the early 80s he split his time working winters in a ski shop in Steamboat Springs and his summers guiding on the Arkansas River. His career in the specialty outdoor industry continued for more than 30 years. Needless to say, he has witnessed decades of change in outdoor equipment and clothing. Steamboat Springs continues to be his home. This piece of original content was sponsored by our Estes Park business partners including Affinity Massage & Wellness Center, The Country Market and Images of RMNP
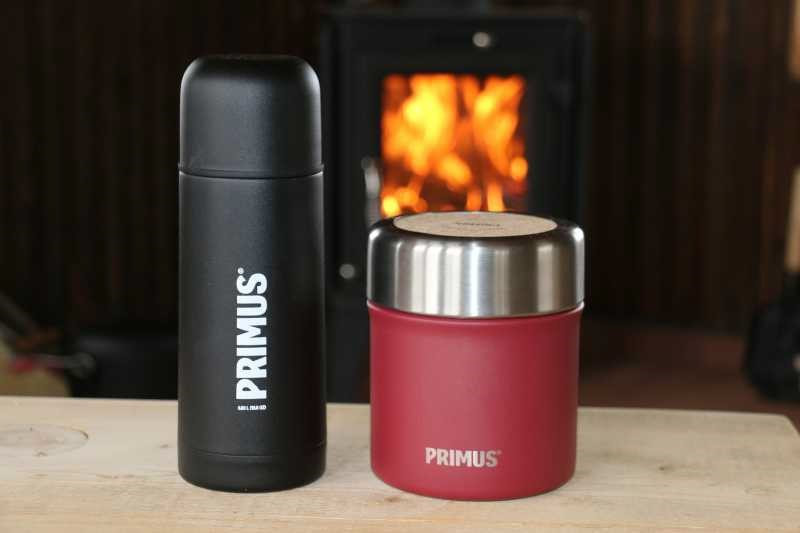
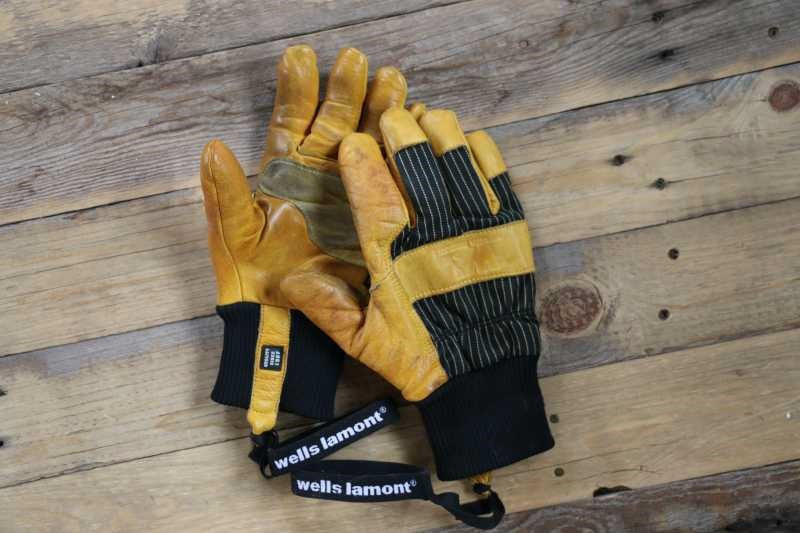
A note from the editor: HIKE ROCKY magazine receives no compensation from the brands reviewed by Murray in this piece story and video by Murray Selleck, HIKE ROCKY magazine's gear reviewer We all have a favorite piece of winter gear. Whether it's a base layer for warmth, a pair of skis that makes one feel like a Norse god or a perfectly-fitting pair of lucky socks, these favorites have the ability to make a winter outing sublime. Over the years, my favorites have evolved just as design, materials, and manufacturing have evolved. I’ve worn out gear that I have reluctantly replaced. I have also given away perfectly good pieces of equipment or clothing that just didn't fit right or suit my skiing preferences. We all have a favorite piece of winter gear. Whether it's a base layer for warmth, a pair of skis that makes one feel like a Norse god or a perfectly-fitting pair of lucky socks, these favorites have the ability to make a winter outing sublime. This selection of equipment and clothing has become essential to my winter backcountry days. I don’t leave home without them! Primus Preppen Vacuum Jug and Vacuum Bottle Cold winter backcountry days when the winds are up and the temperatures down are enhanced with tummy- warming food and drink. I’ve taken to carrying the Primus Preppen Vacuum Jug and their Vacuum Bottle with me on my backcountry ski days. I fill the jug with soup and the bottle with either coffee, tea or hot chocolate. A quick pause from breaking trail and making turns to fuel up with warm food and drink not only provides a boost in energy but a boost in morale, as well! Dark, cold, wintery days suddenly feel not less challenging with tasty comfort food and a hot drink fueling one up. The Primus Preppen Jug and Vacuum Bottle are stainless steel, double walled, and vacuum insulated. The food and drink stay hotter longer. Even after my ski day is done I can still enjoy sipping hot chocolate on the way home. I can’t think of anything much worse than drinking a cold beverage on a bitter, snowy day! One of the most distinct features of the Primus Vacuum Bottle is the click open/close button on the top. Once you screw off the top lid (which doubles as a cup), simply push down on the click button on the second lid to pour your drink. Depending on the thickness of your gloves, it may be difficult to press the button while wearing them. If you don’t want to take off your gloves to click open the top, the easy work around is to just unscrew the second lid and pour from there. A nice feature of the Preppen Jug is its disc of cork on the lid. This no slip surface lets you use the lid as a small backcountry countertop. Place your Vacuum Bottle cup on it as you devour your soup! The Jug’s large lid is easy to grab and unscrew even with your gloves on. Once open, the Preppen Jug’s wide mouth opening makes eating from it simple. Both the Jug and Bottle have a powder coated finish making them easy to grab, hold, and open. If you don’t typically carry an insulated food or drink container on your backcountry ski days you should really consider it. Warm food and hot drinks are a special treat on even a short day out and the Primus insulated food and drink containers are especially good! Wells Lamont HydraHyde Lifty GlovesThe HydraHyde Lifty gloves are by far the best ski gloves I’ve ever worn. This is my fourth winter using this one pair of gloves from Wells Lamont. I have put them through many wet/dry cycles and the leather remains supple, soft, and crack-free. In the past I’ve ruined a few pairs of leather gloves because of my own neglect. Sure, I could have treated those gloves with leather conditioner and kept them in good shape if I had only remembered to do it! With the Wells Lamont Lifty Gloves I don’t have to think about maintaining the leather and that is wonderful from my lazy point of view. Maintenance-free leather gloves save time and money. When I get home from a ski day, I just set the gloves by the wood burner so they can dry. (Wells Lamont does recommend you dry your gloves vertically so if you can hang them or use a vertical glove dryer, that’s even better). The next day the gloves still feel great! From day 1 these gloves have had a comfortable broken-in feel that continues today… even after three years of use. The Wells Lamont HydraHyde is the not-so-secret secret to this great feeling leather. I can’t explain the tanning process but the end result is a water resistant, breathable, maintenance-free leather glove. The water resistance will never wear off. Brilliant! I use these gloves pretty much every cold winter day. For my hands and circulation the amount of insulation is perfect, not too much and not too little. I do wear a lighter pair of gloves on mild winter/spring days, but these are my go-to gloves during our typical cold winter conditions. Here are a few specs:
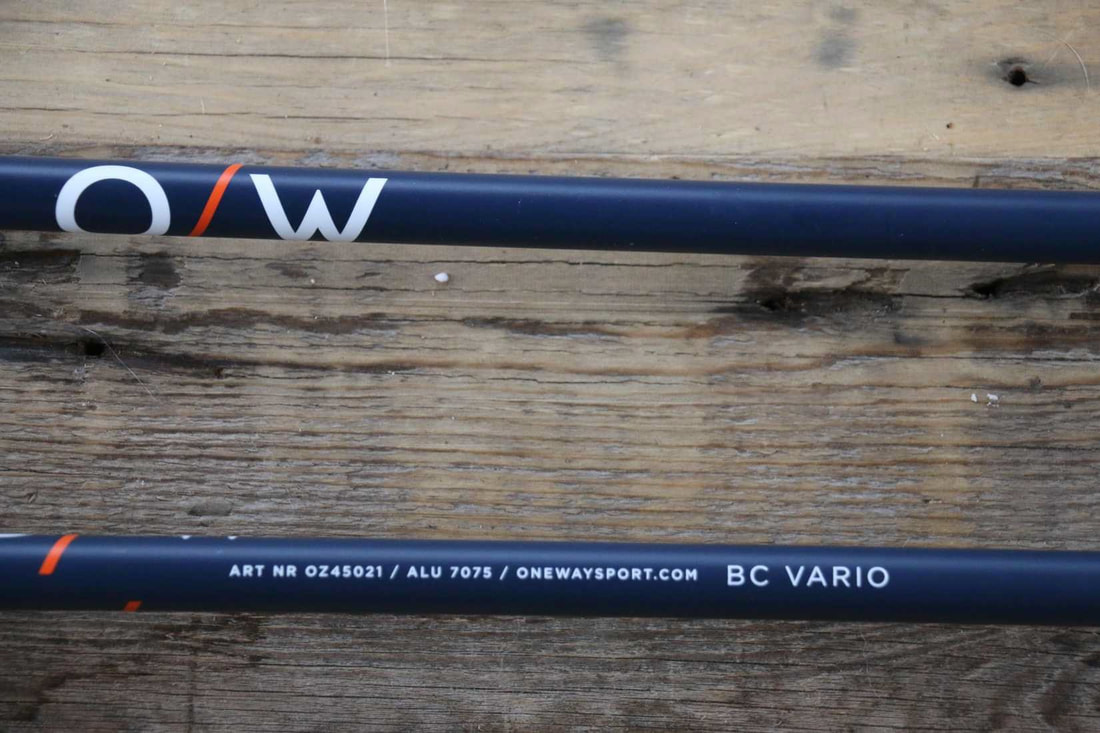
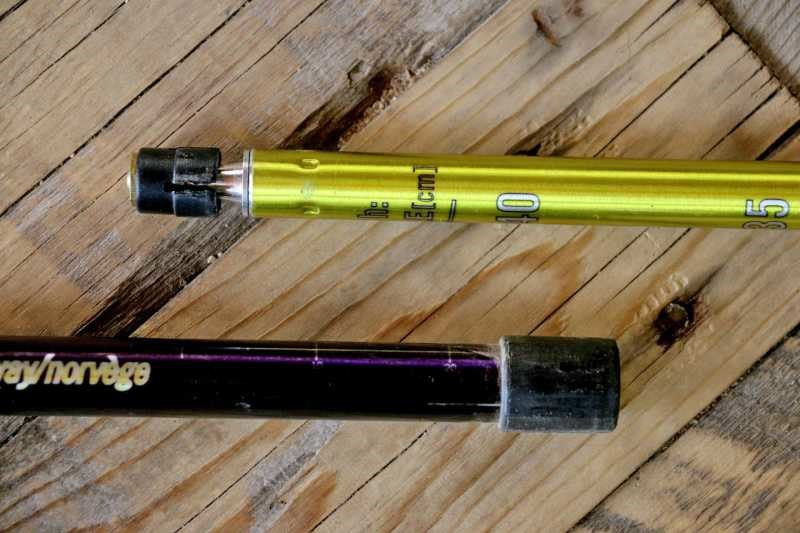
At around $40 the HydraHyde Lifty Glove is a bargain loaded with value! Julbo Aero Sunglasses (light as air) For a long time I wore sunglasses with lenses that were either too light in bright situations or too dark for low light days. I felt like either Mr. Magoo or a deer with headlights in its eyes, straining for definition. Nothing was ideal until I started using the Julbo Aero Sunglasses. The Reactiv lens is photochromic. They become squint- proof dark in really bright sunny conditions and they lighten up to a clear lens in very low light situations. Based on the conditions, the lens changes to allow between 12% and 87% light transmission. The Julbo Aero lens is a semi-shield shape, meaning that it has just one lens, similar to ski goggles. They offer plenty of “wind in your face” eye protection that prevents your eyes from tearing. The frame design offers plenty of ventilation to prevent fogging. I can’t remember this lens ever fogging up on me. And I do use these sunglasses year ‘round biking, hiking, and skiing. The Aeros are incredibly light and with the photochromic lens it is easy to forget you have them on your face! One Way BC Vario XC Poles This aluminum pole was originally built by Fischer Nordic under the same name - BC Vario. When Fischer bought One Way Sports a couple of years back, they handed off the production of this pole to One Way. One Way has since improved the BC Vario. There are several “best” features with this pole. The first is the “Vario” length. With an easy Quick Lock mechanism the pole length can be adjusted from 95cm to 160cm. This is great news for tall skiers who find that their adjustable poles work well for downhill skiing, but don't get quite long enough for comfortable uphill touring. The One Way BC Vario doesn’t discriminate! I like the cork touring grip, as well. In my early backcountry days we skied with adjustable alpine poles. A traditional alpine grip doesn’t allow for a comfortable backward poling motion in your glide phase like a Nordic grip will. The cork does not transmit cold through your gloves and into your hand as easily as a plastic grip will. The cork offers a nice slip free grip that won’t increase the chances of your hands getting cold! One Way added a length of foam just below the cork grip that adds more gripping options for holding the pole. If you don’t want to adjust the length of your pole (either while traversing a side slope or for a short downhill section) then simply hold the pole on the foam grip without using the strap. Options are always a good thing! The basket size is large enough to prevent the pole from sinking too much in deep snow but it is not so big it feels cumbersome. The basket also pivots or articulates to terrain variations as opposed to a fixed-position basket that might deflect off in some snow conditions. The pole has become a bit lighter under One Way’s production and that is another nice benefit. The last and least important feature is that the pole has a nice powder coat finish. It is a nice, refined look versus a “cheap” painted finish. One Way has definitely put some thought into this pole and made some nice improvements. It is a pole that will enhance your cross country ski or snowshoe day. Some folks may call these four items listed “minor accessories” that don’t need much consideration. They may think warm food and drink on a cold day isn’t necessary. A glove is a glove is a glove. A pair of cheap sunglasses will suffice. Poles don’t make any difference… However, I'd argue that any piece of clothing or equipment that you use and don’t think about while you’re using it is always the perfect piece of gear. A skier who is tired and hungry with hands that are wet and cold, eyes that are squinting or poles that aren't long enough to help keep his balance is likely not having as much fun as he could be. Accessories, or essentials as I like to call them, make all the difference in a snowy world!  Murray Selleck moved to Colorado in 1978. In the early 80s he split his time working winters in a ski shop in Steamboat Springs and his summers guiding on the Arkansas River. His career in the specialty outdoor industry has continued for over 30 years. Needless to say, he has witnessed decades of change in outdoor equipment and clothing. Steamboat Springs continues to be his home. The publication of this original content was made possible by: Erik Stensland's Images of RMNP and Inkwell and Brew.
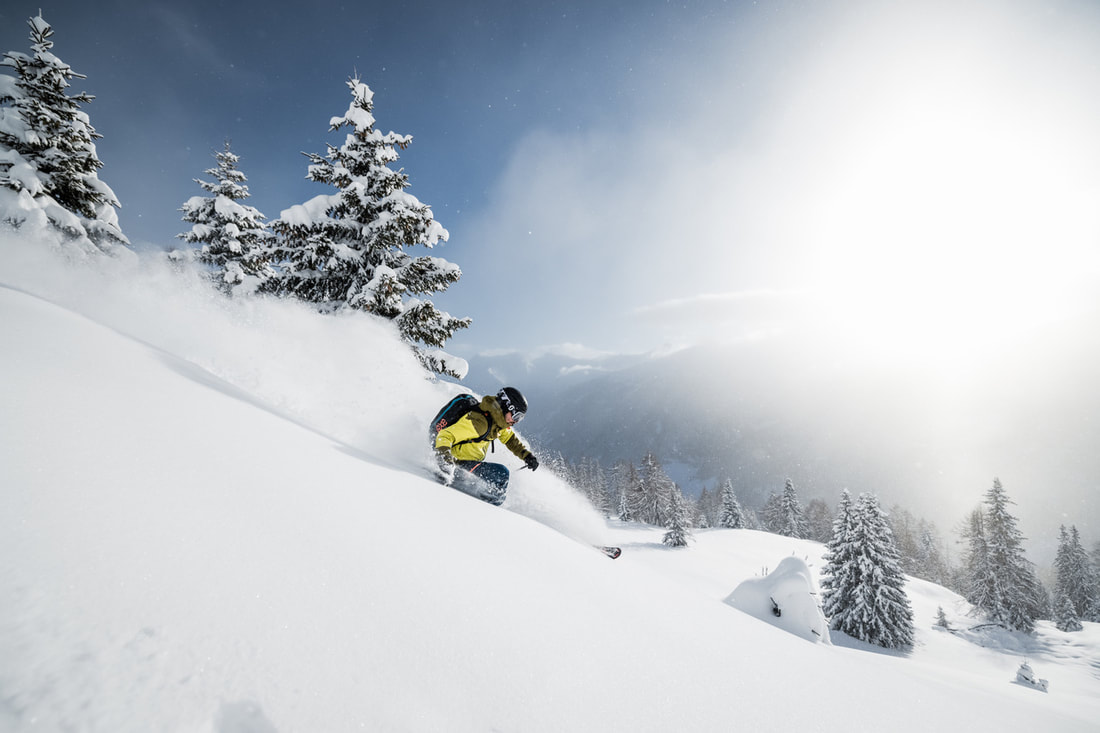
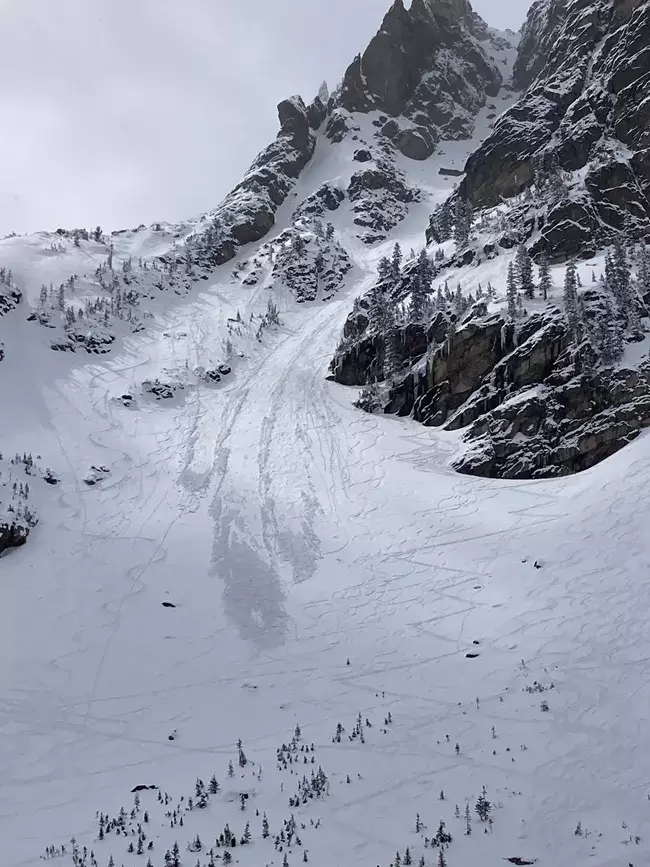
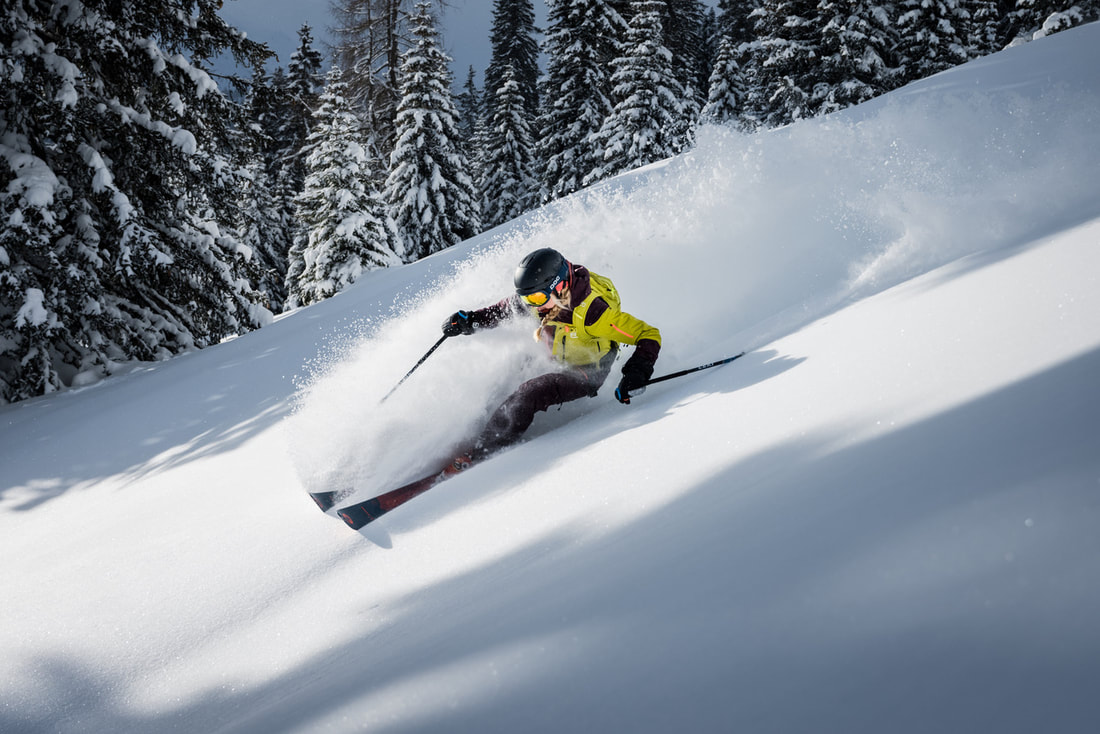
by Murray Selleck, HIKE ROCKY's gear specialist Editor's note: HIKE ROCKY receives no compensation for any of the gear included in Murray's gear recommendations. 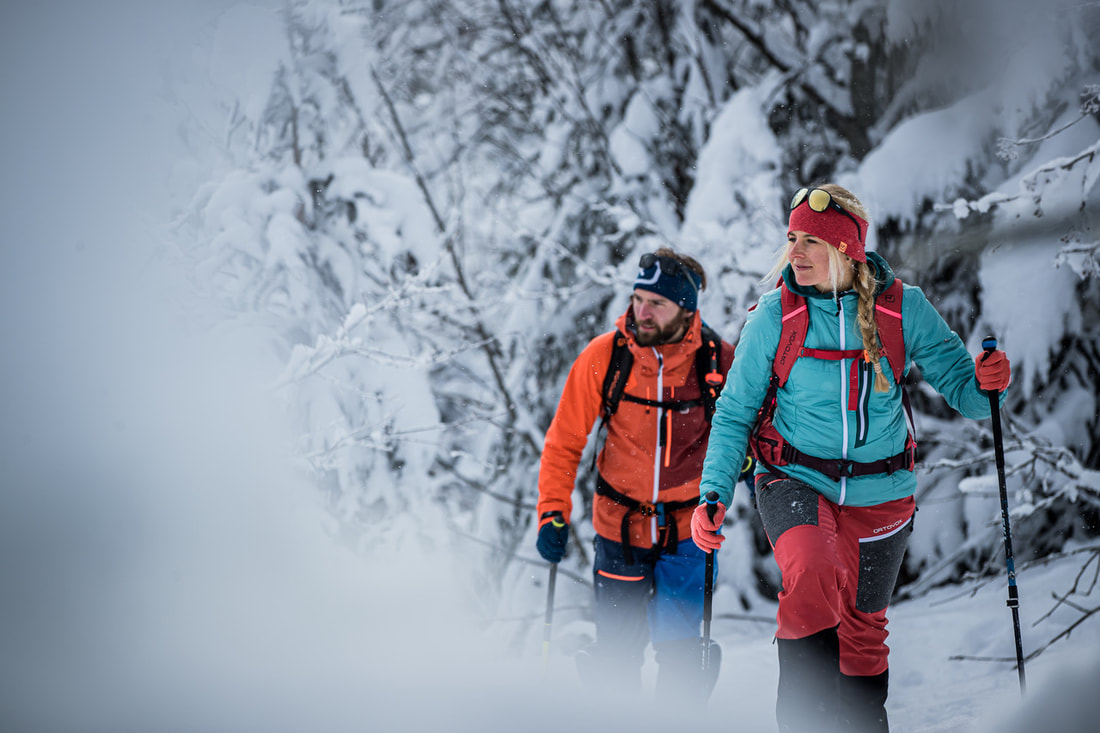 Photo by Photo by Hansi Heckmair/used with permission from #Deuter Photo by Photo by Hansi Heckmair/used with permission from #Deuter It’s a beautiful winter day, the sun is out, the sky is blue, the snow is fresh and incredibly bright, you’re with friends, and it seems like the possibilities of the day are limitless. Many skiers will look to make laps harvesting a perfectly magical slope with alpine touring, telemark, or splitboard equipment. Funny, do you see how all the trees on this slope have no uphill branches? Many more backcountry enthusiasts will snowshoe or hike up into tempting snow globes, looking for valleys filled with amazing winter scenery. Holy cow! Look at all those snow cornices above us on that ridge! Or how about a great cross country ski tour through a winter wonderland with perfectly-gladed trees? What was that whumpfing sound? Did you see the snowpack settle a few inches? And look at this crack in the snow! Where did that come from? Oh, the winter backcountry is so compelling. It sings to you to get out and play in it. You might even compare it to Ulysses and the Sirens… there is beauty and attraction but there is an element of risk and danger as well. There’s no need to tie yourself to a mast or stay indoors all winter to play it safe. There are lots of ways to enjoy the winter backcountry on the equipment you love best while staying safe. It all begins with being equipped, prepared, practiced, educated and skilled. Equipped and Prepared Winter backcountry enthusiasts go into the high country ready for anything the day may bring. A backcountry day may begin with nothing but blue skies but it can quickly turn into an unexpected blizzard! If you are planning on skiing, making turns and harvesting a backcountry slope, you should not only carry the three essential avalanche rescue tools (shovel, beacon, and probe) but the 10 Essentials by The Mountaineers. 1 - Navigation (map, gps, compass or something similar) 2 - Headlamp plus extra batteries 3 - Sun protection 4. First Aid Kit 5. Knife or multitool 6. Fire starter, matches, kindling 7. Emergency Shelter 8. Extra food. 9. Extra water or bring a filter or have the means to melt snow for water 10. Extra clothes, additional base layers, extra gloves, hat, and maybe even extra socks! Avalanches aren’t isolated just to those dramatic avalanche shoots beginning above timberline. They can occur on just about any slope, whether it is wide open, or treed, or steep, or moderately pitched. Small slides that run only a few feet can knock you off balance and bury you. Avalanches do not discriminate. They don’t care if you are on skis, snowboards, snowshoes, or snowmobiles. Even if your day includes skiing terrain that you think has no potential to slide you should still consider carrying a shovel, beacon and probe along with the 10 Essentials. No one plans on spending a cold winter’s night out but it can happen to the best of us. How many times have we heard of a person in the backcountry getting hurt or lost and spending a miserable night out unprepared? Will you be geared up and prepared? Unfortunately, we also consistently hear about people not telling anyone where they are going or when they plan on returning home. If no one knows where you are, how can you expect to get help if you need it? Don’t depend on cell phone coverage to help you out of a situation. Think about all the potential “what ifs.” Let someone know where you’re going and when you expect to be back even if you think your outing will only last a couple hours. Remember a guy named Gilligan? 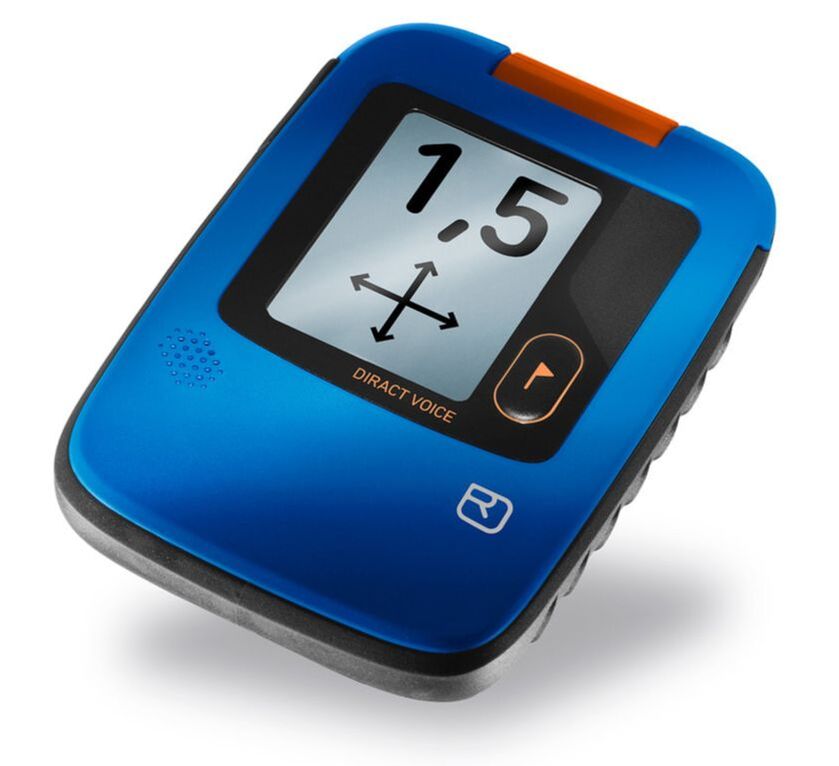 The Ortovox Direct Voice Transceiver is the only transceiver on the market with a voice command feature. A calm and authoritative voice guides you in the right direction to find a buried partner. Other features on the Ortovox Direct Transceiver include a rechargeable lithium battery, 50-meter search distance, easy-to-read display even in bright sunlight, three antennas, product system updates via an app, and an automatic switch from receive to transmit if a secondary avalanche traps a search member who then needs rescuing. Practiced and Skilled Bringing the right gear and wearing the right clothing is always good practice but only if you know how to use your gear and wear the right kind of layers (NO COTTON!). What is the point of carrying an avalanche beacon if you don’t know how to use it? Have you taken an avalanche course? Have you practiced and do you continue to practice with your beacon and ski partners? Do you and your partners test your beacons each time you leave the trailhead parking lot to make sure everyone’s beacons are working properly? How about shoveling? Have you used your shovel to dig a snow pit to identify weak layers in the snowpack? Do you know how to carve out a snow cave or build a snow shelter like a Quinzee hut for shelter or just for fun? Shoveling is hard work. 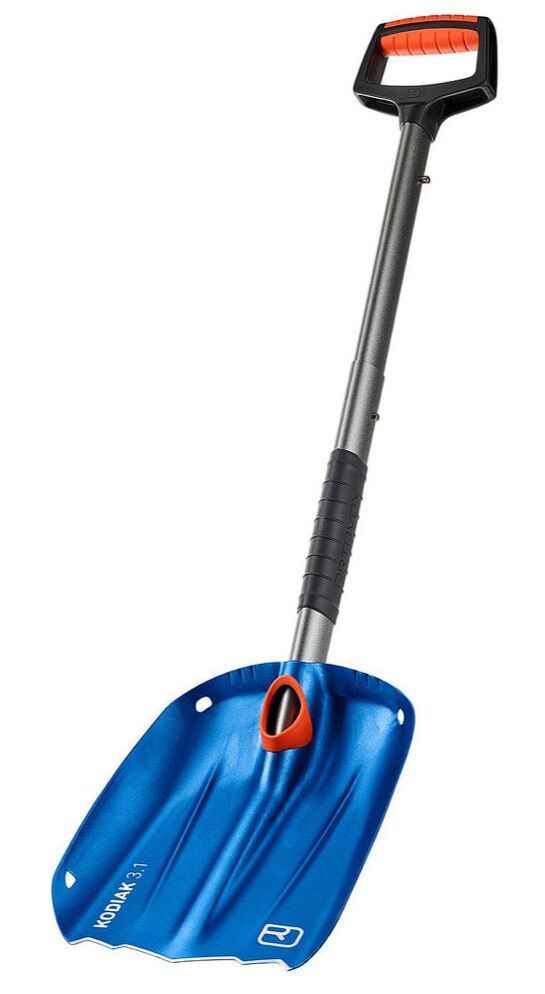 Ortovox Kodiak Shovel: Digging and shoveling snow is hard work, especially through avalanche debris. In a rescue, snow needs to be moved fast and it is certainly not the time to discover carrying the smallest and lightest shovel is no longer to your benefit. The Ortovox Kodiak is an excellent first-choice shovel. The Kodiak’s blade size will move 3.1 liters of snow fast with each motion. The cutting edge of the blade is sharpened so it won’t deflect off blocks of snow. The Kodiak offers two blade positions. The first is the more traditional shovel shape. The second attaches the blade at a 90 degree angle creating an effective clearing motion… similar to a garden hoe. One person can dig and another person can clear the first person’s snow down and away. The Kodiak’s handle shaft is oval shaped to resist spinning and offers a solid connection between shaft and blade. This shovel is also practical for digging snow pits, snow shelters, or even just to have in the car in case you get stuck. Avalanche debris sets up like concrete. Even digging out a snow cave is sweaty work. And do you have extra layers of clothing including extra gloves to replace your wet layer with dry ones once the shoveling is done? Carry an avalanche probe not only for a rescue situation but use your probe to feel the snowpack on your ski or snowshoe tour. Probe the snowpack along the way and on different slope aspects. You will feel where the soft or crusty or hollow layers of snow that are within the snowpack. This is a quick and easy technique that only adds to your snowpack knowledge. 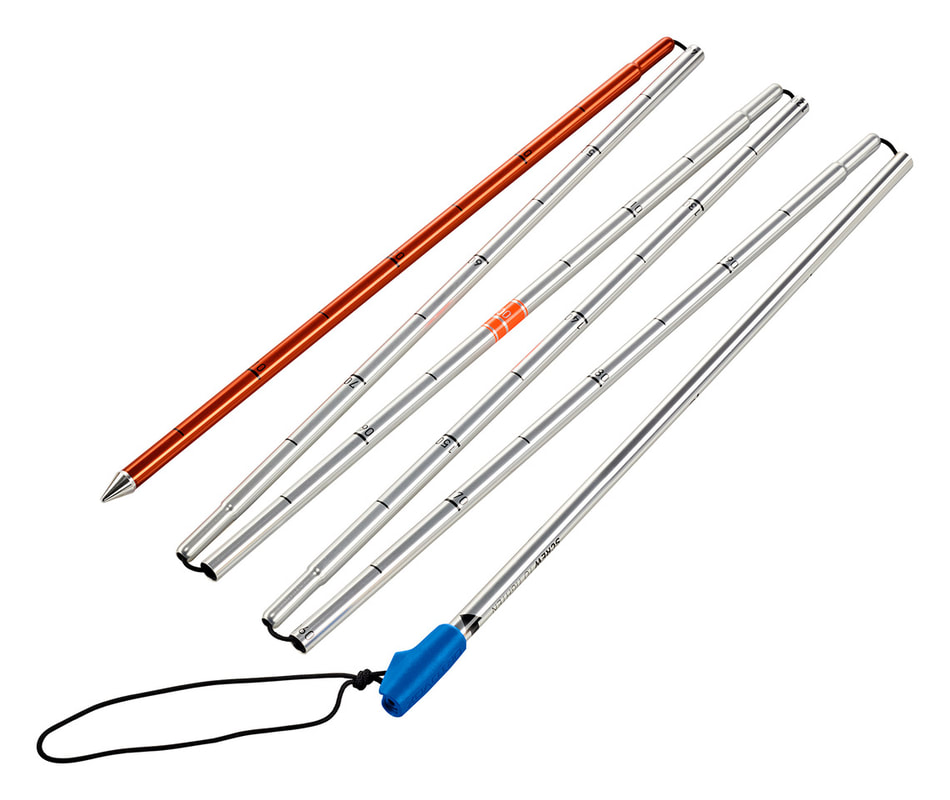 Ortovox Probes A probe allows for pinpoint location of a buried ski partner. Once you’ve located someone buried in an avalanche with your transceiver, a probe will pinpoint the location and also reveal the depth of the burial. All Ortovox probes assemble quickly with one pulling motion. They come with an oversized tip to improve snowpack penetration and reduce probing friction. They are both light enough and stout enough to probe without deflecting or collapsing. The probes have easy- to-read depth markers which provide valuable information regarding shoveling strategy. Ortovox probes come in several models and lengths from 240cm to 320cm. Do you know how to use your ski equipment? I’ve seen a few folks only steps from the parking lot struggling with their alpine touring bindings, split board bindings, and even XC bindings. The trailhead parking lot is not the place to discover you don’t know what you’re doing! Educated is also being skilled and experienced. A great place to start is the Colorado Avalanche Information Center (CAIC). Here you can sign up for courses to learn how avalanches form, what triggers them, nature’s red flags to look out for, and most importantly, how to avoid avalanches in the first place. The CAIC publishes excellent (and accurate) weather forecasts and posts current avalanche conditions. They offer many additional links through their website to help you gain knowledge and be safe. Avalanche awareness information from Rocky Mountain National Park can be found here. Prepared winter enthusiasts have a practical knowledge of the snowpack’s history including past storm cycles, significant temperature fluctuations between winter storms, and significant wind events. They know the current avalanche forecast and conditions by checking in with the CAIC both the night before they leave and the morning of their trip. And they know how to enjoy a winter’s day and avoid trouble even when avalanche danger is high or extreme. Being educated, skilled, and experienced will help you recognize the warning signs of suspect terrain and the inherent weakness of the Colorado snowpack. If you are brand new to exploring the winter backcountry, find willing knowledgeable partners that can share their expertise with you. Better yet, if you're new to the winter backcountry, you could sign up and take a few avalanche courses or backcountry skills classes to be better prepared to eventually strike out on your own. Avalanche or backcountry skills courses will teach you what causes avalanches, how to avoid them, or in worst case scenarios, what to do in a rescue situation. All of this may sound daunting to the point of asking yourself why even bother going into the winter backcountry? Well, we go for the absolute joy of being outside in the winter. We go for the absolute beauty of a winter backcountry day. And of course, we go for the fun! Mother Nature provides us with plenty of clues that let us know how weak or safe the snowpack is. Experience opens your eyes and ears and keeps you safe. Here are a few of the RED FLAGS Mother Nature provides us all winter long:
This article barely touches on all the things a winter backcountry user should know, bring, and trust. There is much to learn about being avalanche aware and being safe in the backcountry. There is no substitute for education, taking classes, and continually practicing what you learn. No one will ever tell you not to explore the winter backcountry, however, everyone will tell you to be safe!  Murray Selleck moved to Colorado in 1978. In the early 80s he split his time working winters in a ski shop in Steamboat Springs and his summers guiding on the Arkansas River. His career in the specialty outdoor industry has continued for over 30 years. Needless to say, he has witnessed decades of change in outdoor equipment and clothing. Steamboat Springs continues to be his home. This piece of independent journalism was made possible by Brownfield's and the Country Market of Estes Park. To find out how to be a HIKE ROCKY business partner, call 970-449-2620
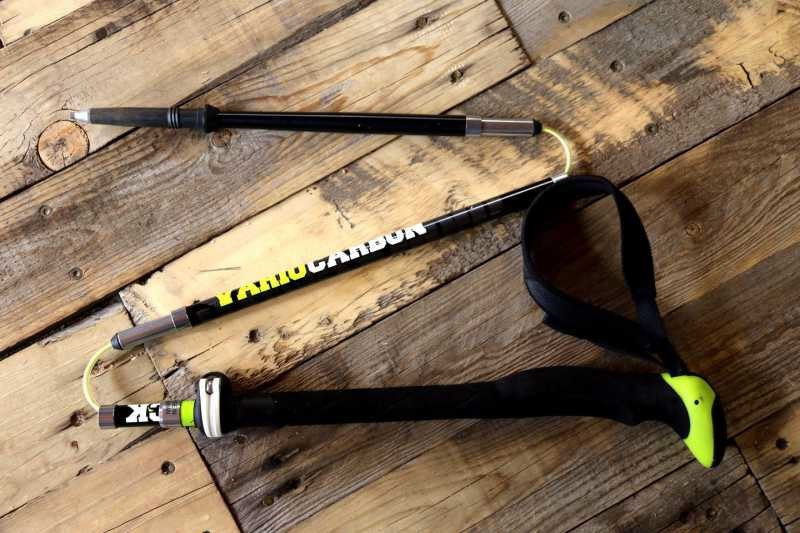
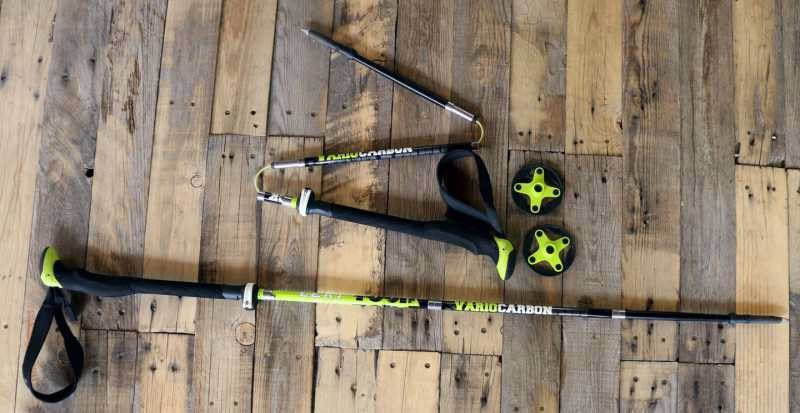
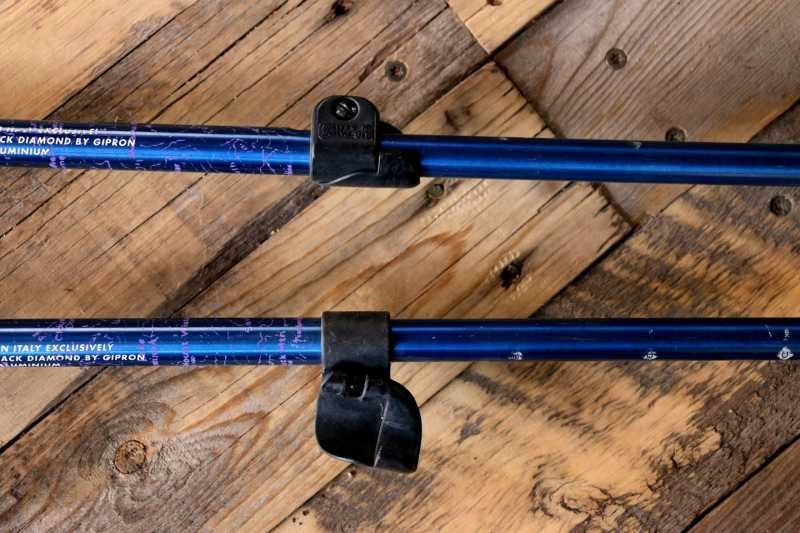
This article is extracted from the current issue of HIKE ROCKY magazine; to learn more about becoming a member to read the entire publication, click here by Murray Selleck, HIKE ROCKY magazine's gear reviewer NOTE: HIKE ROCKY magazine does not receive compensation on brands recommended in Murray's reviews Trekking poles should not be an afterthought as you organize your gear for a hike. Many hikers have changed their thoughts about trekking poles from thinking of them as an optional accessory to believing in them essential. They won't leave home without them! And of course, there are just as many hikers who have never even considered using trekking poles. These hikers are young. Trekking poles are only for older hikers. They're fit. Trekking poles are only for those who need help with their balance. They're athletic. Trekking poles will only get in the way… or so they believe. Trekking poles have come a long way since whittled walking sticks, and their benefits far outweigh any hesitation you many have in using them. If you are open minded to developing the habit of using trekking poles you'll gain hiking performance and increase your endurance. Here is the short list of how trekking poles will benefit you whether you're on a day hike or a multi day backpack trip. Enhance your balance with two additional points of contact: Hike uphill and gain altitude more effectively by using arm, shoulder, and core abdominal muscles. Engaging these muscles on an ascent helps propel you up and forward. An additional benefit is maintaining and even increasing strength in these muscles as you hike. Ease joint stress and muscle strain: Especially on the descent, trekking poles reduce the heavy impact of your feet hitting a hard trail. Multi-functional: Trekking poles can be used to set up a lightweight shelter to wait out a rain shower. They can be used to create a splint in a first aid emergency. With the right poles and accessories they can be used as a monopod for photography. And perhaps, they can be used for self defense in an unpredictable animal situation. Seasonal: Trekking poles can be used year-round as your hiking poles or even in the winter as your snowshoeing pole. Just swap out the baskets! Whether you are looking to purchase your first pair of trekking poles or upgrading an existing pair you'll find plenty of choices to make your selection. Here are a few things to consider when you begin your search. Pole Sizing The best way to size a trekking pole is to hold it. With the grip in your hand and holding the pole in front of you your elbow should be bent about at a 90 degree angle. If it is slightly lower that is better than slightly too long. Sizing the pole length this way gives you a natural arm swing as you hike (especially on level terrain). If the pole is too long you'll be reaching higher to clear the pole as you swing it forward. Reaching higher is wasting energy… A natural feeling arm swing is what you're looking for. Adjustable or fixed length? Adjustable trekking poles can allow for 5 to 10 centimeters of length adjustment up or down. You can really fine tune the length with an adjustable pole to the exact length that feels most comfortable to you. The adjustable pole is handy when the terrain changes. Hiking uphill you may want to shorten your poles. Hiking downhill you may want to lengthen the poles. And on a sidehill traverse you may choose to have one pole longer (downhill side) and one pole shorter (uphill side). Or if you don't care to take the time to make length adjustments on your hike, go with a fixed length pole. Fixed length poles come in 5cm increments. Runners and fast packers prefer this option. They are moving quick and typically won't take the time to adjust their poles no matter the terrain. There are two primary ways to adjust pole length. The original way was with an expansion mechanism located on the top of the lower shaft and as you would twist the upper and lower shafts in opposite directions the expander would grip the inside sidewall of the upper shaft and snug itself tight into place. It is effective but prone to slip if to loose. They're prone to lockup if you tighten it too much and hard to loosen to make another adjustment. Or it required cleaning to keep it working as reliably as possible. Not wonderful. This type of adjustment is still used but found mostly on price point trekking poles. The more effective adjustment is with a flick-lock or cam-style lever. Black Diamond first developed this mechanism and it quickly became incredibly popular. Once the patent ran out the rush for manufacturers to create their own version was unleashed. Now practically every trekking pole has this style of adjustment. Grips Take the time to consider the grips on the poles you want to purchase. Some grips are made with a very hard plastic typically found on price point models. These grips may become slippery especially on hot days when your hands get a bit sweaty but this style of pole and grip will save you money. Foam grips and cork grips are more comfortable no matter the weather. Hot or cold, these grips remain comfortable in your hand but be prepared to pay a little bit more for your poles. These grips are worth the extra money! I recommend checking out the top of the grips for comfort, as well. Often I'll place my palm on the very top of the grip for some extra push. How the top of the grip is shaped can aid in comfort. If it is too narrow or pointed you may lose this as an option for hand placement. Pole Straps Straps can be constructed of simple flat webbing to create a loop or more involved with specific left and right straps with padding. The more refined the design, the more the price of the pole increases. As usual, you get what you pay for! On a recent hike in RMNP I saw several hikers using trekking poles but none of the hikers were using the straps correctly! Check out the photos in this article or play the video for the best way to use your straps. By using the straps correctly you can save energy but not having to grip the grips so firmly. With the strap correctly attached around your hand and wrist you will control your pole placements more effectively. Shock Absorbers Another feature that is well worth the price are shock absorbers. Back in the day, shock absorbers on trekking poles were a metal spring design. The spring was small but it created an almost pogo stick like feel in your hands. Today's shock absorbers are made from elastomers that cushion the shock of the pole hitting the ground or rock and sending that harsh energy into your wrist and elbow. You'll barely notice these elastomers working to absorb those hits. It is a very subtle feel but by the end of the day you know they've done their job because your wrists, arms, and shoulders are still feeling fresh. The elastomer shock absorbers can be found near the bottom of the pole above the tip or ferrule or near the top just below the grips. Overall Weight of Trekking Poles When shopping for trekking poles consider the weight of the poles. The packaging will have this information printed on it but hold the pole and feel the weight of the poles in your hands. Overall weight is important to consider. Less expensive poles will be heavier. More expensive poles (either aluminum or carbon fiber) will weigh considerably less. Swing weight is also a reason to hold the poles in your hands. Overall pick-up weight of the pole is important but how does the pole feel as you swing the pole forward with each step? Swing weight is the resistance you feel bringing the pole forward. The less swing weight you feel the more energy you save along the trail. By lightly swinging the pole forward and back you can feel either more or less swing weight with each pole you try. This little test will also let you feel how snug the upper and lower shafts fit together. Lesser expensive poles might feel loose or wobbly at this connection point. Higher performance poles will feel solid and strong whether it is a two, three, or z-style sectioned pole. Accessories Many trekking pole manufactures include a few accessories with your purchase. The small disc trekking pole basket comes standard on all trekking poles. Some poles come with a winter basket that you can swap out and continue to use your poles in the winter. Other important accessories are tip protectors. These are important in the practice of Leave No Trace. The tip protectors prevent your pole from chipping rock along the way. This is very important on soft sandstone in the desert but should still be a consideration anywhere you hike. Tip protectors will also soften the sound of your poles click, click, clicking up and down the trail… kind of sound proofing the poles. Other accessories might include an option to convert the grips into a monopod for photographers and a stuff sack to keep everything together and easy storage. All-in-all, trekking poles will be a great addition to your hike My one whole-hearted recommendation, no matter which manufacturer or model you choose, is to use the pole straps correctly. Don't look like a rookie out there! Happy Trails. 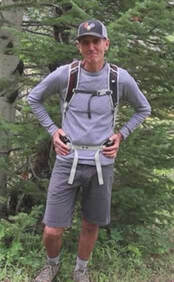 Murray Selleck moved to Colorado in 1978. In the early 80’s he split his time working winters in a ski shop in Steamboat Springs and his summers guiding on the Arkansas River. His career in the specialty outdoor industry has continued for over 30 years. Needless to say, he has witnessed decades of change in outdoor equipment and clothing. Steamboat Springs continues to be home. The publication of this piece of independent and local journalism was made possible by Brownfield's and Rambo's Longhorn Liquor, both of Estes Park.
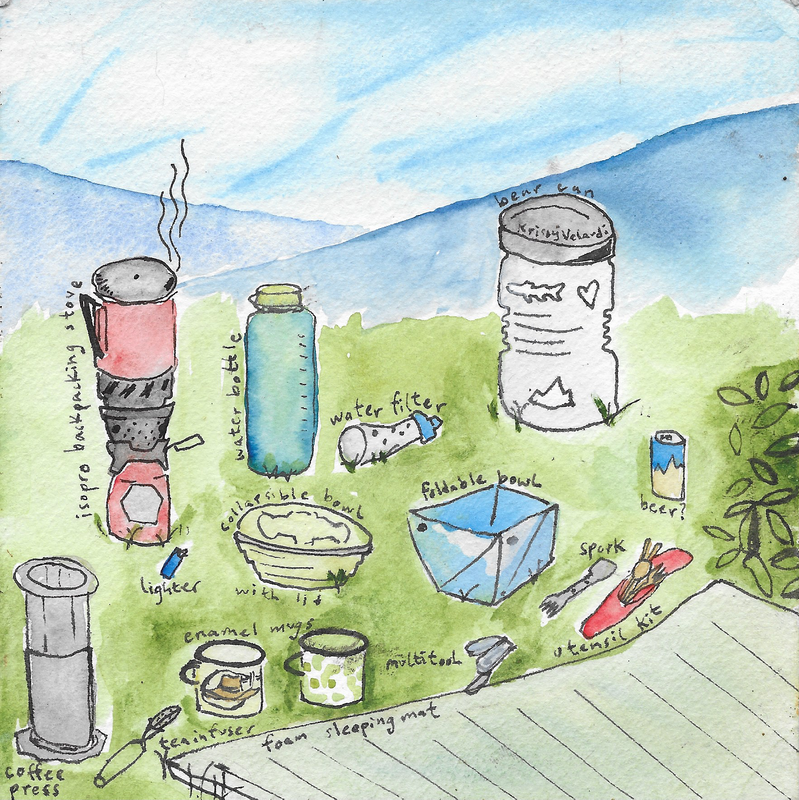
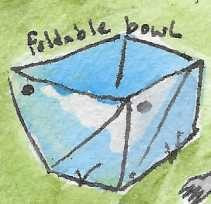
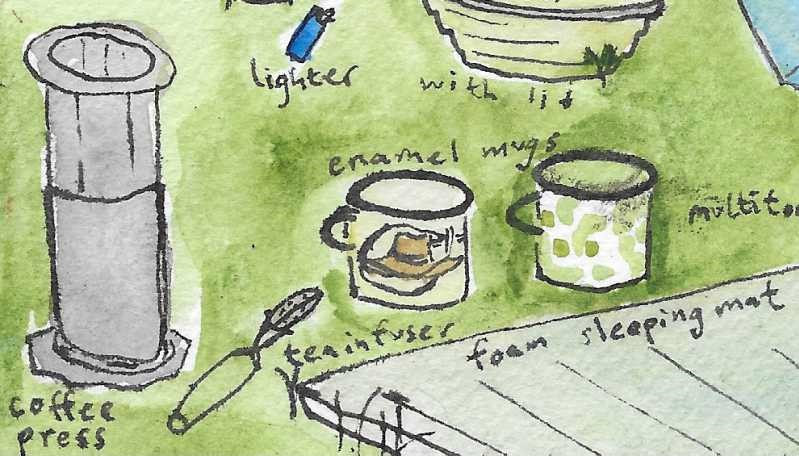
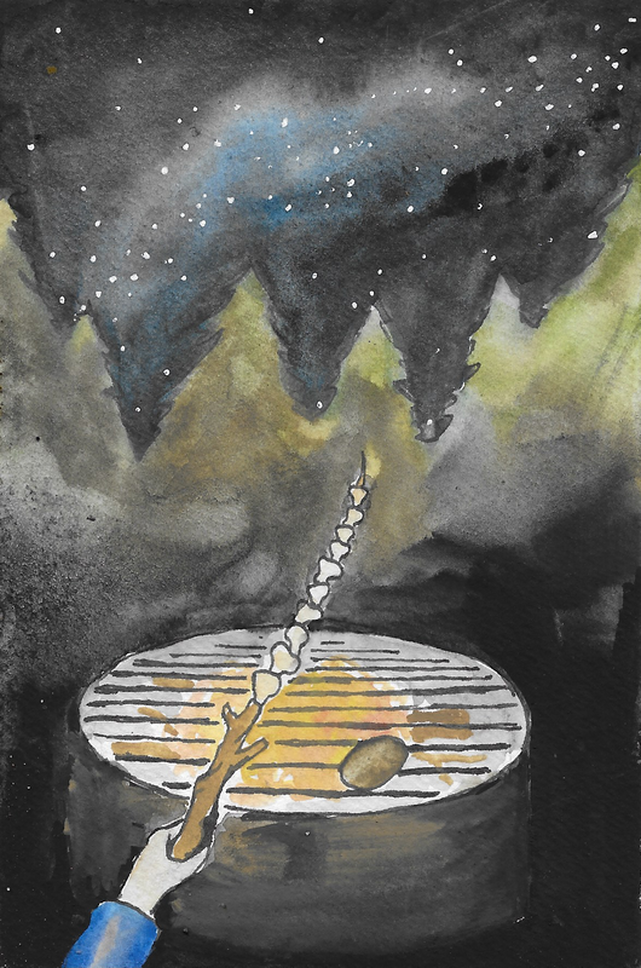
Story and illustrations by Krissy Velardi Note: The writing and illustrations in this article are all done by myself, but it would be wrong not to credit the ideas equally to Zenith and Clay—two of the best friends anyone could ask for on and off the trail. - Krissy On a crystal-clear early autumn day this year, Clay and I ventured over Trail Ridge Road to the Grand Lake area to hike the North Inlet/Tonahutu loop over 3 days and two nights. As with any proper adventure, I could write endlessly about the magic of our journey. But here, I am just going to dive into how we fueled our bodies for nearly 30 miles in the backcountry. A lot of people opt for the pre-packaged just-add- boiling-water backpacking meals because the concept of cooking without a full kitchen can be intimidating. But to us, it is always worth a little extra love and effort to eat beautiful, nutritious home-cooked meals on the trail (plus it saves quite a bit of money!). Of course, we have had our share of flops, but the recipes here have been refined over many backcountry excursions. That being said, you don't need to hike 30 miles to try these recipes out for yourself. They're great for bringing on day hikes or even just making something quick at home whilst dreaming of the mountains. Kitchen setup 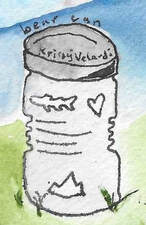 Bear can: In many mountainous areas, including Rocky Mountain National Park and the Indian Peaks, a bear canister is required for food storage. It is basically a giant plastic tub that requires opposable thumbs to open, designed to keep human food inaccessible to bears. It is an important factor in deciding what foods to bring because you need to be able to fit all of your food and other “smellables” (deodorant, toothpaste, etc.) inside of it. For that reason, a lot of our selections are purposefully compact which also serves the dual purpose of being lightweight. 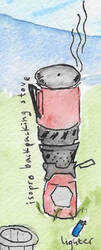 Isopro backpacking stove: Of all the camp stove styles I've tried over the years, my favorite for backpacking uses isobutane/propane blended fuel and has an integrated pot. These stoves are optimized simply for boiling water but you'd be surprised how much you can cook this way! They are also permitted in areas with fire bans because the flame is elevated from the ground. My stove is a fancy expensive windproof version, but you can find a basic isopro-fueled stove for under $20 and use any small, thin, metal pot with it. Some models have a built-in igniter, but I always pack an extra lighter since they can be finicky. Better safe than hungry!  Water filter: Countless styles have been invented over the years, but I find the most compact and easiest to use to be a soft-flask style that you fill directly with water and squeeze through a filter threaded onto the opening. I bring this on any day hike with a water source, and sometimes even around town so I can fill my water bottle from the river. Remember to always filter water before you drink or cook with it, even if you're going to be boiling it.  Water bottle: I prefer to hike with a hydration bladder, but a water bottle is good to have around for the kitchen since it's much easier to pour water out of for cooking. 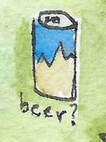 Beer?: Good for sunsets, summits, cooking, and campfires. Carefully place some rocks to hold your can at the edge of the river and leave it there for a few minutes to chill. If the refreshment of cracking open a cold one is worth the weight of carrying a can or two, then don't be afraid to indulge. Getting out there is all about enjoying yourself responsibly. Bowl: Especially if you're cooking for one, you can opt to skip this and eat out of your pot. These days I like to bring a collapsible bowl with a threaded lid and Clay uses a bowl that unfolds out into a plate for easy cleaning and packing. But in the past I used to simply bring tupperware. Just make sure whatever you choose is fairly light and sturdy. 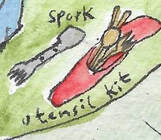 Utensils: A titanium spork is lightweight, heat resistant, and durable. This is my utensil of choice… but on this particular trip I forgot any utensil and whittled a new spork from a stick. Clay generally brings bamboo utensils in a convenient little canvas pouch to keep them all together in his pack. And of course, your household utensils work just as well outdoors too. 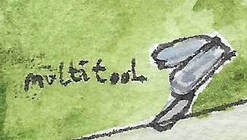 Multitool: Mostly I just cut fairly soft vegetables, but it's nice to have the option of a few blades as well as scissors for opening packages. This is what I used to whittle my utensil too. Coffee press/tea infuser: These are the best ways we've found for making hot beverages on trail while also avoiding single-use products. We measure out coffee grounds/ tea leaves beforehand and pack them in a small container. Alternately, I sometimes just bring matcha since it dissolves and therefore does not require an infuser. And if I'm feeling fancy, I'll add some powdered coconut milk to it for a backcountry matcha latte. Enamel mugs: For coffee, for tea, for sharing a beer, for side dishes, for hitting with a stick at impromptu jam sessions. Foam sleeping mat: In colder weather, I prefer an inflatable mat. But the foam ones are great for a comfy place to sit wherever you decide to make a meal. Snacks I always carry one or two granola bars per person per day in addition to a sweet snack (banana chips on this trip) and a salty one or two (pistachios and a spicy snack mix). Some ingredients, such as granola, can double as a snack if you bring extra. Plus we packed a dark chocolate bar that we shared for dessert over the two nights. The salty snacks are good for electrolytes but snacking in general is extra important because your body is going to want a lot more calories when you're working it like this. It's really important for a fun backpacking experience to find calorically-dense foods that you truly enjoy! Day 1 Breakfast: Trailhead breakfast burritos (propane stove) As we prepared the rest of the food and finished up packing for our trip, we used a cast iron skillet on a two- burner propane stove to make breakfast burritos at Grand Lake. To power the first bit of our journey, we cooked up some sweet potatoes, red onions, black beans, and eggs,wrapped it all up in tortillas, and put them back on the skillet to toast the outside. It was simple but packed full of nutrition to get us ready for a big adventure! Lunch: Peanut sauce veggie wraps (no stove) Prepare at home: To a half-full jar of nut butter, add a pinch of black pepper, a hearty shake of garlic powder, a squirt of hot sauce (to taste), and a splash of something acidic (lemon/lime juice or apple cider vinegar). Top it off with soy sauce or hoisin sauce, being careful not to make it too thin, especially if you choose soy sauce, since you want to maintain a spreadable consistency. Give a good stir, then close the jar, shake it all up, and toss it in your bear can. A standard size jar makes about 4–6 servings if you really like to heap it on. On the trail: Take out a tortilla and spread a saucy stripe down the middle. Cut/rip up a liberal amount of crunchy veggies (we used bell pepper and carrot) and pile them on. Roll it up, using a bit more of the peanut sauce as glue to hold the wrap together. I've tried pre- making these wraps, but they get a little soggy so it's best to just assemble them on trail. Dinner: Wild mushroom rice bowls (isopro stove + campfire [optional]) At home: Fill a bag with dehydrated mushrooms (I love the exotic blend we would buy at the farmers market in the summertime, but be sure not to include any that are too large as they take much longer to rehydrate), sesame seeds, dried seaweed (we typically use wakame), salt, pepper, and umami seasoning. Pack another bag or jar with some instant white rice. Although I prefer brown rice, the instant white rice seems to cook much better with just boiling water poured over it. In another small jar, add some miso paste. On trail: Well, we packed the dehydrated mushrooms but ended up finding such an abundance of wild mushrooms (see note) while still on Forest Service land before we entered Rocky. We picked a few of those to use instead! Our first campsite had a fire ring and small wood fires were permitted, so we made a fire and skewered our mushrooms to roast while we prepared the rest of the recipe In the pot of your isopro stove, boil water (1:1 ratio with the total amount of rice you'll prepare) and the contents of your mushroom-seaweed-spice blend as well as a heaping spoonful or two of miso paste. Pour a serving of instant white rice into each bowl. Once the contents of the stove have come to a boil, turn the heat down and give it just a minute or two more (making sure the mushrooms have time to rehydrate) and then pour them all together into the bowls of rice. Stir everything up and let it sit for a few minutes. Chop up a bit of zucchini into small pieces to add some crunch then toss it on top once the rice has absorbed all of the water. Note: Do not ever consume wild foods you have not identified with 100% confidence. If you have any doubt whatsoever, leave it. If you are intending to forage, carry a field guide and collect responsibly. Don't gather a significant por'tion of what you see or more than you'll eat. And, always pack a backup rather than relying on being able to forage. Day 2 Breakfast: Mango cobbler oatmeal (isopro stove) At home: Mix quick-cooking oatmeal with cinnamon, coconut milk powder, and brown sugar, being sure to leave some nuggets of brown sugar. Put the mango (or your fruit of choice) in a bowl or mug to keep it from getting bruised in your pack. On trail: This was a big day of hiking, so in order to get going early we ate some granola bars while packing up the tent then hiked a few miles before stopping to cook breakfast by a cascade. Pour a serving of oatmeal into each bowl and cut up the mango while bringing a full pot of water to a boil. Add some of the boiling water to the oats and let sit while you use the remainder to make a pot of tea/coffee. Once the oats have absorbed the water to your desired consistency, sprinkle the top with some granola and uncooked oats. Lunch: Peanut sauce veggie wraps 2.0 (no stove) It is really nice to have a go-to lunch that doesn't require a stove in case you want to keep it speedy but also because that mountain sun can be hot midday! Additionally, it can be extra windy above the treeline which makes it difficult to use most stoves. We brought enough peanut sauce for two rounds and then used bell pepper again but swapped in zucchini in place of carrot to mix things up a bit. Other veggies that work well are cucumber, red cabbage (cut into large pieces at home), leeks, and bean sprouts. Dinner: Mushroom mash (isopro stove) This wasn't what we had intended but after hiking 12 miles all above 10,000' with the weight of our packs, we simply wanted to go to sleep. So this is what happened: I'm the type to get a little upset when hungry so I always bring some instant mashed potatoes (dubbed “hanger tates”) as a preventative measure. They get used on every trip, and it keeps me pleasant enough that my friends continue to want to go backpacking with me. At home: Fill a bag or jar with instant mashed potato flakes, salt, pepper, and garlic powder. On trail: Bring water and dehydrated mushrooms to a boil over an isopro stove. Add some potatoes to each bowl. Once mushrooms are properly hydrated, distribute the contents of the pot amongst the bowls and feast. Day 3 Breakfast: Cobbler oats 2.0 (isopro stove) We didn't bring a second fresh fruit, so on the morning of day 3, we added some banana chips and extra granola to the top of our cobbler oats and they were delicious this way as well. Another pot of tea helped to wake us up. Lunch: Miso mushroom ramen (isopro stove) We planned to have this for lunch on trail and carried the ingredients in our bear can, but it was scorching hot as we hiked through a burn scar in the midday sun. So we sat with our toes in the river, sharing a cool beer and snacking on some granola bars, and decided to wait until we got off trail so we could add a soft-boiled egg and cook on the beach of the lake. However, we have previously brought eggs on trail, wrapped in a clean sock or bandana then packed firmly in a tupperware. At home: We used the same mushroom/ seaweed/ spice mix and miso as we did for the rice bowls we had for dinner on Day 1. On trail: Fill pot just over halfway with water then add flavorings and bring to a boil. Once boiling, add an egg for each person and slightly lower heat. Let the rolling boil continue for about five minutes. Carefully remove the eggs from the hot broth and place them in a mug of cool water to chill for a few minutes. Add 1 or 1.5 packets of instant ramen noodles (we forgo the flavor pouches that come with them in lieu of our homemade mix) to each bowl and pour the hot broth over them. Let sit a few minutes, periodically separating the noodle “nests” as they soften. Chop up some fresh crunchy zucchini as a topping. Peel the eggs, add them to the bowls, and enjoy with a view! 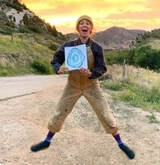 Krissy Velardi is a nature-loving nomad who was carried to Colorado on the wind. When she is not dancing through the mountains, she is daydreaming about them and often laying those whimsical visions down on paper. To see artistic interpretations of her other wanderings, go to krissyvelardi.com or @acorngirldesign on instagram The publication of this piece of independent and local journalism was made possible by Snowy Peaks Winery and Kirk's Mountain Adventures, both of Estes Park.
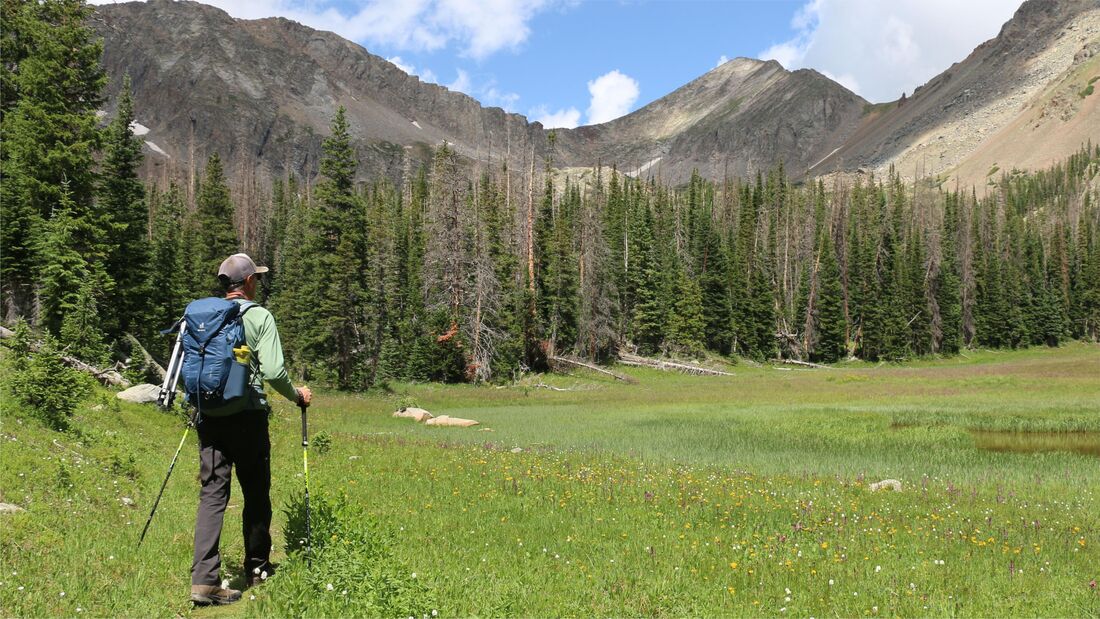
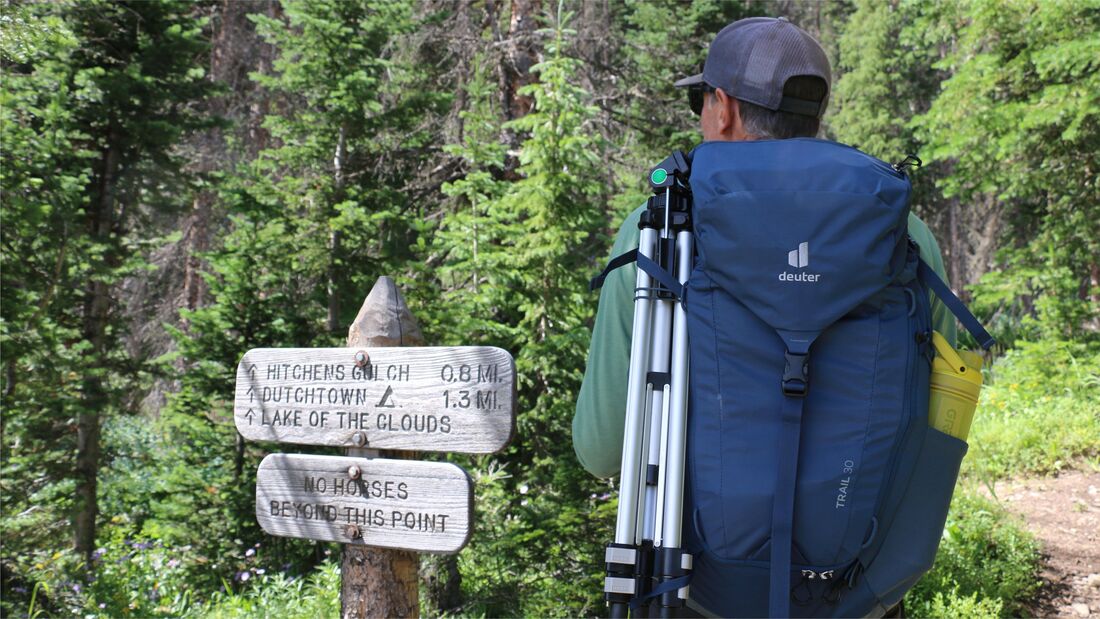
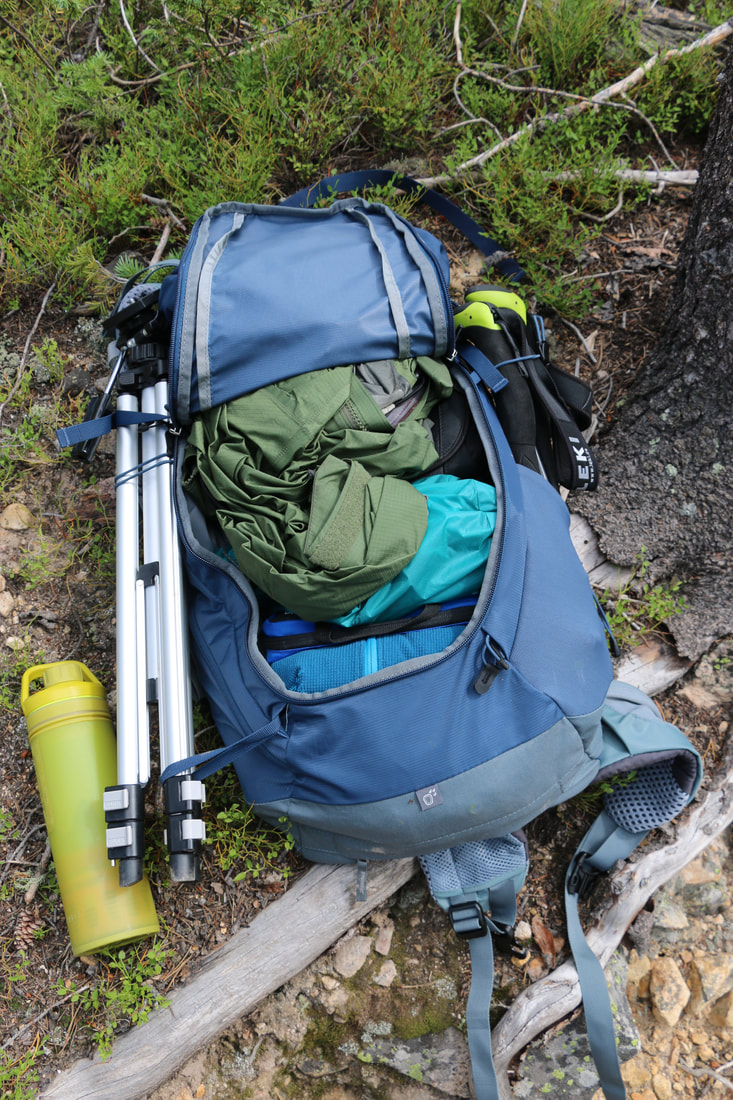
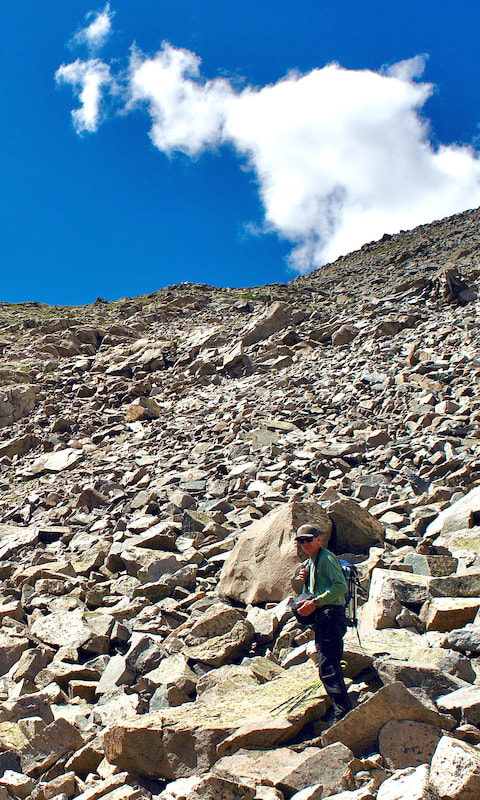
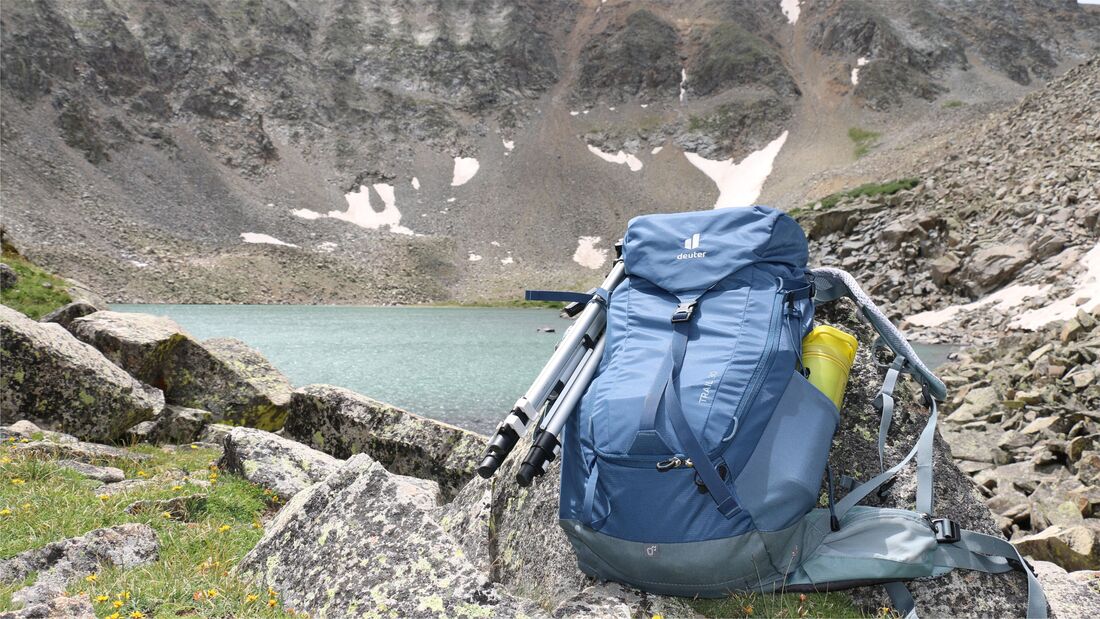
Story, photos, and video by Murray Selleck, HIKE ROCKY magazine's equipment specialist Editor’s note: HIKE ROCKY receives no compensation from brands reviewed by Murray. Recently, I had the opportunity to carry the Deuter Trail 30 daypack to Lake of the Clouds on the westside of Rocky Mountain National Park. The pack carried great and I highly recommend the Trail 30 for your day hiking adventures. To qualify a few things about my day hiking style, I am not a light packer. I probably carry more than what I need but I'm not about to put Murphy's Law to the test. If I don't pack it I'll probably need it and if I pack it, odds are I won't use it. But, if I have it and use it I'm one happy hiker. That is one convoluted way of saying the weight in my pack can add up quickly. The Deuter Trail 30 carried everything I wanted extremely well. The number 30 refers to liters or the volume of the pack. A 30 liter day pack can hold a lot and may be a bit big for some hikers. Or it can even be a bit small for day hiking depending on who you are and what you like to take. Your pack size depends on where you're going, how long it will take, and if you're carrying additional items for members in your group. Kids anyone? One of my main considerations regarding pack size is how well it supports and carries the weight? For instance, your hiking partner may pack 30 liters of feathers and you carry 30 liters of rock. That is a huge difference in weight. Regardless of what you are carrying, how a pack's harness system handles the weight is just as important as the volume of the pack. For our hike to Lake of the Clouds the Trail 30 was perfect. It offered the volume to load what I wanted to take and a harness system that allowed me to carry that weight comfortably. Favorite Features: Pack Access: One of my most favorite features of the Trail 30 is how you access the inside of the pack. At first glance the Trail 30 is a traditional top loader. But take asecond look and you'll find a zippered front panel access, as well. A clause in Murphy's Law says whatever you want out of your pack it will be at the bottom. With lots of traditional top loaders that means emptying your pack trailside looking for that one elusive item. With Deuter's front panel access you can easily see and find exactly what you are looking for without emptying your entire pack! Brilliant! Benefit: When we had reached Lake of the Clouds strong gusty winds greeted us. The wind was rippin'! It was time to find and put on my windbreaker. With the panel access into the main body of the pack I found my windbreaker easily (at the bottom of the pack). Right after our lunch break a rain squall came over the ridge. Again I was able to grab my rain jacket easily from the pack as we started our way back down. Aircontact Harness System: Another great feature is Deuter's Aircontact harness system. On either side of the back panel are two vertical ventilated pads that create a channel your spine centers between. You feel immediate comfort. The hip belt creates a comfy wrap around your hips. A key here is how the hip belt is attached to the back panel. The two attachment points are pretty close together and that is what helps create this snug, enveloping, wrapping feel around your hips. The hip belt itself is nice and wide which creates a bunch of nice surface area that creates comfort. And with its increased surface area that also helps carry the load of what you are packing. Pull down the perfectly padded shoulder straps (not overly padded and not too thin either), pull in the load stabilizers forward off the top of the straps and suddenly you have a pack that is snug to your body, supporting the weight of what you have packed inside your pack, allowing for all day hiking comfort. Benefit: Besides supporting the weight inside the pack this harness system snugs the pack comfortably against your body. As we worked our way up through the boulder field on the final approach to Lake of the Clouds the pack moved with me smartly with each step. I was able to maintain a steady pace both up and down the boulder field, keeping my balance, maintaining a steady pace, and not really being aware of the pack on my back at all. Pockets and Packing Options: There are many ways to pack a pack and the Deuter Trail 30 gives you plenty of options. The top lid offers two pockets. There is an inside sleeve that can accommodate a water reservoir or use it to divide out contents inside the pack. Outside there is a water bottle holder and another zippered pocket which can be used in any number of ways. I used the zippered outside pocket for a second water bottle, packed my primary water bottle in the other pocket, used the ice axe loop and lash strap for my tripod, and later in the hike attached my hiking poles to the other lash straps outside. A place for everything and everything in its place! Benefit: Not everyone takes the same things or likes to pack their packs the same way. Having lots of options to handle what you like to take is a benefit we can all enjoy. Load Compression Straps: There are two sets of compression straps on the Trail 30. Two external straps at the top and two internal straps near the bottom. Benefit: Compression straps stabilize the load side the pack. When there are more ways to prevent the contents from shifting inside your pack the better. Compression straps also reduce the volume of the pack before you pack it. If you want to take less with you the compression straps allow you to still pack your pack vertically without everything just flopping to the bottom of the pack Rain Cover: Deuter includes a rain cover with the Trail 30. The rain cover is tucked away in its own pocket at the bottom of the pack. This is a great feature that adds value with your purchase. Pack rain covers cost at least $40 so this represents some nice savings for you. Benefit: Keep the contents inside your pack dry during a heavy thunderstorm. Dealing with wet gear is a hassle especially when the stuff that is wet is what you wanted to stay dry! Additional Features: Delrin Internal Pack Frame, Hydration Sleeve, Adjustable Sternum Strap, Pocket on the Hip Belt, Trekking Pole Lash Straps, SOS label under top lid. Price: $140.00 Closing Thoughts: Deuter is a German company and have been making packs since 1898. The USA distribution is located in Longmont, Colorado, that's pretty much right in Rocky Mountain National Park's front yard! And their Longmont location makes Deuter a Colorado company, as well. Deuter's quality is excellent and they offer a huge line of packs from kid's packs to kid carriers to fast and light packs to long haul backpacks. When you are looking for your next pack make the effort to seek out a Deuter pack… quality never disappoints! 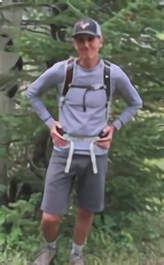 Murray Selleck moved to Colorado in 1978. In the early 80’s he split his time working winters in a ski shop in Steamboat Springs and his summers guiding on the Arkansas River. His career in the specialty outdoor industry has continued for over 30 years. Needless to say, he has witnessed decades of change in outdoor equipment and clothing. Steamboat Springs continues to be home. The publication of this article of independent and local journalism was made possible by the following sponsors.
Video and story by Murray Selleck, HIKE ROCKY magazine's equipment specialist Editor’s note: HIKE ROCKY receives no compensation from brands reviewed by Murray. At any point in human history, whatever tools or conveniences we had at our disposal to make our lives more comfortable were close to perfect, for the time. Thankfully, design evolved to help us along our way. A drafty cave evolved into a cozy cabin. A smoky campfire became an easy-to-control kitchen stove. And perhaps most importantly, cold rocks and lumpy logs evolved into incredibly comfortable and portable camp chairs! Thank goodness for designers and engineers who can see both the limitations of a current design and the potential for something better. Depending on how you think of them, camp chairs are a relatively new phenomenon. However, I do remember being a youngster, sitting in my grandparents’ back yard in the 1960’s. The classic lawn chairs with their cheap webbed fabric and folding aluminum frames might be considered the first portable camp chairs. The only thing excellent that I remember about them are the memories of watching lightning bugs, fireworks, and the stars during those warm Texas summer nights. For many years of my camping and backpacking experience, the well-placed rock, log, or lumpy tundra sufficed as my backcountry chair. The mountain and ocean scenery always made up for my sore backside or legs that went to sleep because of an awkward position. Oof, sometimes standing up was an adventure of dizzying head rushes along with sore muscle stretches enhanced with dramatic, out loud, groans. The sound effects did help… As I recall, the venerable Crazy Creek Chair company took the initial steps to adding sitting comfort to our campsites. They were based in Montana along with several other companies that produced accessories that would convert sleeping pads into camp chairs. Helinox came out with their original Camp One chair not that many years ago. Taking the tent-pole concept of shock-corded aluminum poles and and then adding a sling of fabric to complete the chair, Helinox created a truly easy-to -carry, lightweight, and portable sit-up-off-the-ground camp chair. Once the Helinox chairs hit the market, it took only minutes for the outdoor industry to create an intense battle of manufacturers who added their own take on similarly-designed camp chairs. Today the number of choices of backpacking festival, and camp chairs is pretty overwhelming. Where do you begin and how do you choose? As always, let your intended use and, in this case, comfort, be your guide. Here are five excellent choices to help you sit, relax, and lounge your day or evening away in comfort. Nemo Stargazer Lounger Deluxe The Stargazer is perhaps one of the most unique and misunderstood chairs. It’s a chair, a lounger, and it swings! It is incredibly comfortable if you give your initial sitting test a reasonable chance. Often folks sit in this chair all too briefly and miss out on its features and special capabilities. The key here is its adjustability. Sit back. Put your feet up on a cooler. Stay awhile! The set-up is incredibly simple. Fix the shock-corded aluminum sections together in the appropriate slots of the hubs to form the frame. Attach the two side clips to the two most upright vertical sections, fix into position the back rest supports (optional), and that’s it. Three easy steps and you’re ready to enjoy a relaxing time in the mountains. The unique thing about this chair is that there are no straps for you to adjust to manage your sitting position. Just by leaning forward or back the chair’s straps do all the work for you, automatically. You can sit tall and upright. Or, simply lean back and the self adjusting webbing allows you to recline and lounge. Lean all the way back and you have the most comfortable view to stargaze the night away. When I’ve used this lounger and reclined all the way back, I like to have my feet up on a cooler, or a stump, or some other kind of way to prop my feet up. This little enhancement takes the comfort level way over the top. Talk about total relaxation! And the fact that this chair also swings is particularly unique to the outdoor industry. Sure, there are rocking chair options out there but if you don’t have the perfect surface to set it up on you’re left with a rocking chair that doesn’t rock or it feels like it has the hiccups! With the Nemo Stargazer you can rock smoothly to your heart’s own beat. Now, here is chair with rhythm! A convenient spill-free cup/bottle holder, adjustable headrest/pillow, stash pocket, and padded carrying case round out the feature list for this combo chair/lounger. The specs: $249.95. Dimensions 27x36x44 in. 7lbs 2 oz. Another great chair to check out from Nemo is their Moonlight Reclining Chair. Travel Chair Shorty Camp Couch When it comes to the ultimate simple set-up, the Travel Chair Shorty Camp Couch is it. Take the couch out of its storage bag and spread the frame out. The couch material is already attached. Spread the frame and legs out and it’s completely set up with nothing left to do but relax. This two-seater is very comfortable whether you share it with a friend or you spread out solo-couch potato style. The only complaint I’ve heard about the Shorty Camp Couch is, for some people, it sits too low. (Did they check out the Shorty Camp Couch’s name?). They say it is too hard to get up from. I understand that but any effort is a good effort and if it takes a little effort to get up from the couch I think that can be a good thing. Engage those muscles! I find the height of the couch to be really nice. Not too high that it reduces comfort and not too low that you feel you’re sitting on the ground. At this height, you can extend your legs out with comfort. The Travel Chair Camp Couch offers the perfect compromise of campsite sitting elevation. Sharing this couch with a friend or sitting close to your partner as daylight fades is really nice. Single-seating chairs are nice and all but a couch? Snuggling in close to your spouse rather than being separated with two chairs is a wonderful thing… especially as the temperature drops and the stars begin to shine! Adjustable arm rests, insulated cup holders, and an easy-to-carry storage bag round out the features. The Specs: $150.00. 44” wide. 31.5” tall. 13.5” off the ground. 16.5 pounds. 600lbs. capacity or 300lbs per seat. Another great Travel Chair to check out is the ABC Buffalo Plaid Chair. What’s not to love about red and black buffalo plaid? (super cool) Eno Lounger DL - There is a love/hate relationship between campers and their choice of camp chairs. What you may find really comfortable and the perfect height from the ground your best friend may be thinking, “Are you kidding me?” And so I say this: splitting the comfort test by the slimmest of margins I find the Eno (Eagles Nest Outfitters) Lounger to be one of the most comfortable and relaxing chairs to end the day with. It feels like you are sitting in a cocoon of comfort. It practically feels like you’re snugged into an upright hammock. This makes sense since ENO specializes in hammocks. The Lounger is just an incredible extension of their hammock designs. The tall back of the Lounger DL allows for safe napping (or just resting my eyes, as I like to say), by eliminating the dangers of the head bobbing, neck cracking, and whiplashing when falling asleep sitting up. Why ruin a perfectly good nap with a painful bobble-head impersonation? Set-up is a simple task. Fix the shock-corded aluminum poles into their appropriate hubs, attach the chair fabric, and voila! You’re done. I like to attach the chair fabric to the lower pole sections at the bottom of the chair first. Attach the top of the chair to the back poles second. You can use the leverage of the two longer poles that form the back to push them together to attach the chair’s fabric with ease. The lounger has adjustable legs to lower or increase your seating height from 3” to 10” off the ground. You can sit a little closer to the ground (important at festivals where chair height restrictions might be a consideration) or extend the additional pole sections to elevate yourself a bit higher up. If the chair height is the only camp decision you have to make at the end of the day count yourself lucky and lazy! A cup holder, two storage pockets, and an integrated, very comfortable pillow round out the feature list. The Specs: $139.95. 74 ounces. 250 lbs capacity. Dimensions 32x23x37. Another great chair to check out from Eno is the lightweight Lounger SL. Big Agnes Big Six Big Agnes was the former USA distributor of Helinox chairs. Their business relationship ended, so logically Big Agnes came out with their own design of camp chairs. While the concept is similar there is a durability and design difference that makes the Big Agnes Big Six worth a look … er, I mean, a sit-down. Big Agnes doesn’t use hubs to form the frame that supports the chair once it’s set up. Instead the shock-corded aluminum pole sections have a groove in them that only let the poles nest together in a specific way. The poles all slot through each other without the use of hubs. The groove or key design not only locks the poles together effectively but the groove also creates more surface area so the poles and the holes they slot through won’t “volcano” out. The shape of the poles won’t deform over time, the attachments make the connections stronger. And since there are no hubs, which can prove bulky, the chair packs into its stuff sack easier, and is lighter. The Big Six offers a more upright sitting position and the seating height is higher than the other chairs mentioned earlier. So if you prefer not to slouch and like a more upright position, this chair will be a nice choice. The seat is nice and wide (24”) ‘cause we know not all seats are the same. The tall upright back still offers the safe napping feature that I find to be critical when choosing a camp chair! One more integrated clever design is the self-equalizing center pole which levels the chair on uneven ground. No more endless searches with your construction level to find the perfect spot to set up your chair. Assemble it, set it, and sit in it! The Specs: $189.95. 3lbs 3 oz. 300 lbs capacity. Another excellent chair to check out from Big Agnes is the Skyline UL chair. If you want to backpack with a chair and save weight and space this one can do it all. Big Agnes Mica Basin The Mica Basin offers the same features as the Big Six but it is a low-back chair. Its back rest is not as tall or as nap friendly. The design offers a more compact chair both in its overall size but in its packed size as well. If your pack, truck, camper, or trailer is tight for packing space the Mica Basin will be a good option. Ready to dayhike, camp, or backpack? Pull up a chair, relax, put your feet up, and stay while!  Murray Selleck moved to Colorado in 1978. In the early 80’s he split his time working winters in a ski shop in Steamboat Springs and his summers guiding on the Arkansas River. His career in the specialty outdoor industry has continued for over 30 years. Needless to say, he has witnessed decades of change in outdoor equipment and clothing. Steamboat Springs continues to be home. Every day can be a rainy day in Rocky this time of year Story and photos by Murray Selleck, HIKE ROCKY’S equipment specialist Editor's note: Murray's recommendations are based on his decades of experience in the outdoor clothing industry and neither HIKE ROCKY magazine or the author received compensation from the brands recommended. One of the most exciting things about rain gear is the fact that if you are wearing it, most likely it's raining! In the arid, drought-stricken west, a rain shower, no matter how short lived, is a wonderful thing. However, once the summer monsoon kicks in with its unpredictable drenching afternoon downpours, rain can become your bane. The monsoon can be a gully- washing regrettable experience if you're caught out in the right place at the wrong time. Most of us who love exploring Rocky Mountain National Park and the surrounding mountains have experienced a surprise thunderstorm on a forecasted bluebird day. We might have said to ourselves that a quick jaunt up a trail will be no big deal. A pack loaded with the essentials won't be needed and a simple water bottle will get me there and back. And about when you reach the turn-around spot, or even a little beyond, the skies darken, the wind begins to gust, and a bolt or two of lightning has us thinking, “What was I thinking?” What to Take: Waterproof? Water Resistant? Windproof? Oh my! A waterproof jacket or even a paper-thin windbreaker can save the day. That is to say, if we have enough foresight to take a shell jacket along with us! From short scoots up a familiar trail to day hiking and backpacking to through hiking, which kind of shell you want to bring along depends on trip duration, your budget, jacket features, and your area's most common climate. The conditions: Intermittent rain showers, curtains of virga in the distance, shifting shafts of sunlight spotlighting the valleys below, cool breezes and comfortable temperatures; it’s a perfect day for a day hike. Under these conditions, a lightweight water-resistant shell that doubles as a windbreaker can potentially provide enough protection on this kind of summer day. If you properly layer underneath, it with a tech t-shirt or synthetic or wool next-to-skin layer, even if a shower wets through the jacket to these underlying layers, you can stay comfortable. Mind you, these shells are fine for quick, fast-moving, light showers and not much more. These thin shells serve better as windbreakers than effective rain gear. The jacket's material and tight weave creates the water resistance and wind barrier. Usually there isn't even an additional water barrier treatment. As I said, during a brief shower they can work great, they're quick drying, and they are enough to get you by. Another benefit to a windbreaker shell is how much warmer they can keep you when cool high-altitude winds are blowing. The shell will effectively trap more body heat around you leaving you the perfect temperature! You roll the dice with this style of jacket. Hit the trail and take your chances when it comes to the weather. Bluebird, showers, or come what may! The conditions: drenching downpours, heavy monsoons, mountains peaks disappear behind thick curtains or rain, gobs of grapple, trails turn into creeks of running water, unforgiving hail, thunder, and lightning… You’re in the thick of the storm now! You had better armor up when Mother Nature decides to let loose. Waterproof/windproof/ breathable jackets and pants provide the best protection and comfort from hard rains and monsoonal downpours. Along with being waterproof, breathability is an equally important feature. It's easy to make a jacket waterproof but to make it breathe effectively is another. If you are hiking, running, or climbing in a rain storm, the heat you generate will quickly exceed what the breathable laminate can expel. Suddenly you are surrounded by a tropical climate trapped under your jacket and you're getting wet from both the outside and in! I struggle with reduced hearing and vision when I have a hood up over my head. Hearing the sounds of the mountains are reduced and I miss hearing the nuances of the forest. Also, even with the ability to adjust a hood back or forward and snug it to your head shape, peripheral vision can be reduced. I've had hoods that when I turn my head to one side or another my hood doesn't! I wind up looking straight into the hood and not out to the side where I want to look. Don't read too much into my hood dilemma. Hooded rain jackets are far more popular than jackets without. My rant should only serve as a buyer's guide as you try jackets on for fit in your favorite shop. Check out all the features a jacket offers and see if they make sense to you. Waterproof technologies There are two main technologies that outdoor specialty manufacturers use to produce their waterproof garments. DWR (Durable Water Repellency), membranes like GoreTex, or a combination of the two. DWRs are a spray-on layer that can be applied to either the outside of the jacket or as a protective layer over the laminate on the inside of the jacket. DWRs are less expensive to produce so a jacket with this kind of waterproofness is less expensive to buy. Membranes are a waterproof/breathable layer bonded or laminated to the jacket's fabric. They are more durable than a DWR treatment. GoreTex is the most common and recognizable brand in this category but excellent competitors also exist. eVent, OutDry Extreme, Pertex Shield, and others keep the category and prices competitive. A combination of these technologies let manufacturers build 2, 2.5, and 3 layer options. Waterproof/breathable/windproof: bottom line The outdoor specialty industry has no lack of manufactures or choices. There is an abundance of excellent rain gear available competing for your dollars. Gear reviews, online consumer reviews, and manufacturer's highlights all serve a purpose but the bottom line will always be how a specific piece of gear works for the individual who is using it. Read all about it. Learn both how a product excels and what its limitations are. Balance those out to see what fits! In the meantime, along with hiking, climbing, and trail-running in the rain, with the right rain gear choice you can add chasing rainbows and singing in the monsoon!  Murray Selleck moved to Colorado in 1978. In the early 80’s he split his time working winters in a ski shop in Steamboat Springs and his summers guiding on the Arkansas River. His career in the specialty outdoor industry has continued for over 30 years. Needless to say, he has witnessed decades of change in outdoor equipment and clothing. Steamboat Springs continues to be home. editor's note: this story is pulled out in its entirety from the February/March edition of HIKE ROCKY digital magazine. For more information about the magazine visit this page by Murray Selleck, HIKE ROCKY'S equipment specialist HIKE ROCKY's gear reviews are unsolicited. With apologies to Paul Simon, when spring-like weather hits the Rocky Mountains, we are all just “slip-sliding away.” When winter snowfall transitions from fluffy powder to rock hard ice, each step can become treacherous. Freeze-thaw cycles, wind driven spindrift, even solar radiation on cloudy days create the perfect conditions for ice that can send us flying off our feet. Have you tried hiking up an icy trail without weighting your feet? The analogy of walking on egg shells is appropriate, as well. If we’re not careful with every step, ice will send us airborne. This wouldn’t be so bad except for the inevitable landing. This is where traction devices that you attach to your winter footwear come into play and save the day. Snowshoes, crampons, spikes, cleats, studs, coils… The choices for traction on your boots are many. Where do you begin? How do you choose? With every piece of equipment or clothing that you choose always begin with your intended use. Will you be using your traction device to negotiate icy sidewalks in town? Are you a runner maintaining your winter fitness running on trails or roads? Or will you be hiking towards the high alpine peaks of RMNP crossing frozen lakes and negotiating your way through iced over boulder fields? These three different scenarios show very different traction needs and wants. Knowing your intended use before you buy will help you make your decision. There are four basic traction designs. The one feature that holds true with each of the traction device models shown here is a flexible rubber frame or rand that stretches over your shoe’s toe box and around the heel with enough tension to hold it in place. Beyond this one shared feature, the traction offered is where the decision making begins. Wire Coils One of the more popular traction devices for walking and town use are the Yaktrax Walk ($19.95) or Yaktrax Pro models (29.95). These use a sturdy wire coil connected to its rubber frame. The wire coil offers low profile traction that allows for a natural walking gait. You won’t necessarily have to adjust your normal walking style or lift your foot any higher to clear the coil from the ground. This is definitely a consideration with traction devices that offer more aggressive or longer (taller) spikes The Yaktrax Walk is the most basic model. The Yaktrax Pro has an additional strap that fits over the top of your instep for additional retention and security. Yaktrax designs both models for walking or running. Tip: If you’re between sizes on any traction device try to go with the smaller size for better retention on your boots or shoes. Fitting them smaller does offer better retention but it may be a struggle to pull them on. If you use a larger size you risk a loose fit and the traction device might come off in the most inopportune time. Studs Kahtoola makes a model named EXO Spikes ($59.95) and while Kahtoola calls them spikes I think of them more along the lines of studs you might see on a studded car tire. The small, low profile tungsten carbide studs dig into ice and hard packed snow nicely. The wrap around rubber frame comes up and over the top of your footwear’s toe box and further up towards your instep to keep the traction device in place. More retention is nice. I like the low profile studs and they are built for action. With running shoes and or softer sole shoes you won’t feel any of the studs underneath your shoes with each weighted stride. This lets you think about the terrain you’re running on versus feeling any unnatural ridges or pressure points from spikes with each step. Of course, you’ll need to consider the depth of the studs and the amount of traction you require. On steeper terrain, they may not be enough but on modest hills while running or walking fast they are more than suitable. Tip: Using trekking poles or ski poles along with your traction device while running will help with stability and traction. Poles help propel you up hills faster and provide another point of stable contact while descending. Diamond-shaped rotating beads Ice Trekkers Diamond Grip ($49.95) and Yaktrax Diamond Grip ($49.95) are very similar to each other. Both use unique “diamond” shaped beads. The big difference here is the number of potential contact points and the fact that the diamond beads rotate on a small steel cable. (Of course they are not made of diamonds but their marketing guys worked late into the night on that name). The design of the beads are multifaceted like a diamond increasing the number of contact points with ice. Each time you put these on your winter footwear the position of the diamond studs changes. You aren’t using the same contact points time after time so longevity and durability are increased. Traction devices that use a fixed point of contact may dull out sooner than these that rotate. When weighted, the rotating diamond grips grab and hold ice securely. Tip: After use, it is best to air dry your traction device. Don’t pack them away into a stuff sack or some place where they can’t dry completely. Rust is generally not a problem out west but it does occur. Keeping your traction devices rust-free will help them last longer. Spikes Kathoola Micro Spikes ($69.95) and the Snowline Chanson Pro ($64.95) offer the most aggressive traction. The spikes will remind you of crampons used for glacier travel, or perhaps to some extent, even vertical ice climbing crampons minus the front points. The spike length is the most aggressive at 3/8 inch long or 1 centimeter. This doesn’t sound significant but when compared to all the others mentioned so far it is. These are perfect for more adventurous terrain with steeper ups and downs with significant ice conditions. You may have to think about how you walk to clear the length of the spikes as your foot strides forward. There is some getting used to them the first time you use them. If you drag your feet the spikes could catch giving you that feeling of stubbing your toe against a rock or root on a summertime hike. You don’t want your traction device to be the cause of a fall… talk about irony, defined! Another cautionary note is being aware that in certain snow conditions snow or ice can accumulate under your foot. This can also happen with snowshoe crampons and metal edges of cross country skis. When the snow has become wet the metal traction device, snowshoe crampon, or metal edges of your skis has remained cold and a clump of snow can either ball up or ice can form on this metal reducing your traction. The easy fix is to tap your foot, snowshoe, or ski with a pole and break the packed mess free (you do risk breaking your pole if you whack too hard). Or, preventing this icy buildup in the first place can be done with spray- on glide wax made for xc skis. Spray the wax on and let it completely dry before you use them. Another small issue that can happen over time is the spikes will become dull with use. A traction device with dull spikes won’t dig in as easily. The good news is you’re using your spikes often. That means you’re getting out. Well done! To help prolong the life of your spikes take a file to them once in awhile. A little maintenance with a file to keep the spike points sharper is smart. Ice climbers do this often to their ice axes and crampons. Why can’t you with your traction device? Tip: With all traction devices centering them on the soles of your footwear is important. You can reduce the chances of breakage or premature wear and tear with a correct fit and centering them correctly on your boots or shoes. Rocky Mountain Day Hikes/HIKE ROCKY magazine contributors’ preferences We did an informal pole with our RMDH fellow contributors to see which brand and style of traction devices they use. Here are their preferences: Marlene Borneman: Kahtoola Microspikes; Dave Rusk & Barb Boyer Buck: Snowline Chainsen Pro; Rebecca Detterline: Yaktrax “Ice Trekkers;” and, Chris Reveley, uses two brands: XTR Extreme Outdoor Traction and a traction device from Hillsound. The takeaway from this? Personal preferences always rule the day. One person’s day of confidence is another person’s day filled with “slippin’ and a sliding!”  Murray Selleck moved to Colorado in 1978. In the early 80’s he split his time working winters in a ski shop in Steamboat Springs and his summers guiding on the Arkansas River. His career in the specialty outdoor industry has continued for over 30 years. Needless to say, he has witnessed decades of change in outdoor equipment and clothing. Steamboat Springs continues to be home. |
Categories
All
|
© Copyright 2025 Barefoot Publications, All Rights Reserved
